
It was 20 degrees here in Jersey for about a week, which to us is very cold. During the winter I like my neckline close to my neck so no cold air goes down my back (or my front for that matter.)
While working on my pattern for a top I noticed how far my back neckline sat away from my neck. I could just imagine the cold air that would travel down there. But thankfully for this particular pattern it’s an easy fix.
The Problem
Because I’m a “little thick” across my shoulder blades, a straight center back seam or even a slightly curved center back (which this pattern is) doesn’t work. They make my neckline too large, causing the gap in my back neckline. By the way, I know most people call it “back fat”, but I like “thickness” better.
You can see my curvy back on my dress form double in the photo above. Yes, I know she’s a little crude, but she serves her purpose.
My back pattern piece has to give me the width I need across the shoulder blades without giving me the extra width in the back neckline. This means my center back seam has to have a little more curve to it from the shoulder blades to the neckline.
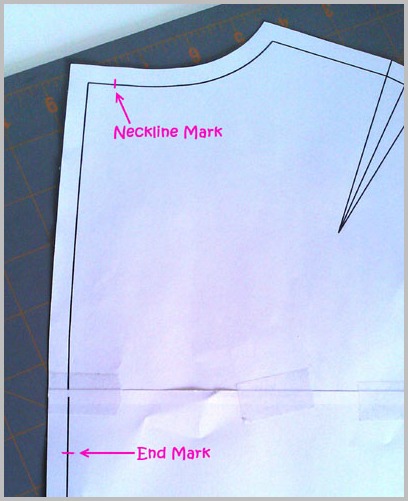
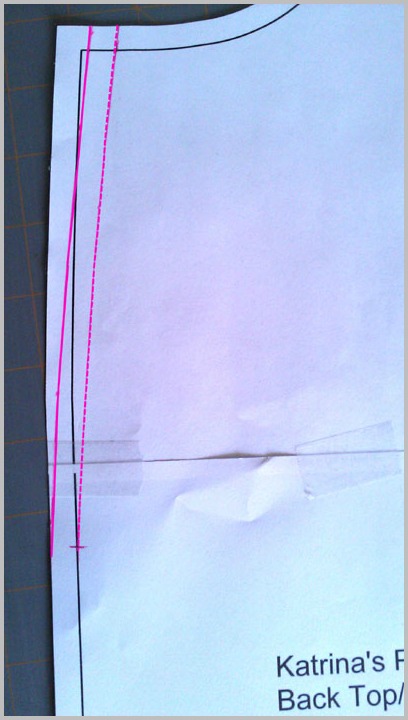
Below is a my original pattern piece before the alteration.

The Solution
Measure the amount that needs to be taken out of the neckline. Mark the amount on the stitching line of your pattern, measuring from the center back at the neckline. I need to take out 1/2 inch (for a total of 1 inch).
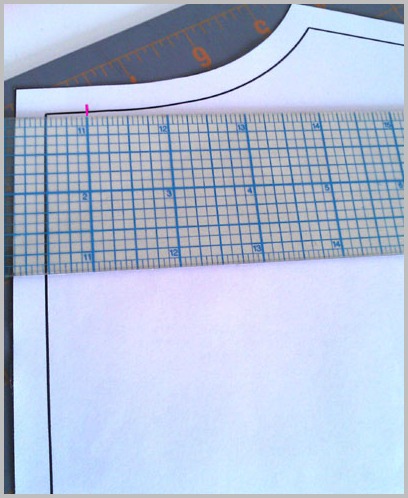
Mark where you need your curved line to end on the center back stitching line. I need to end my line 7 inches from the neckline.
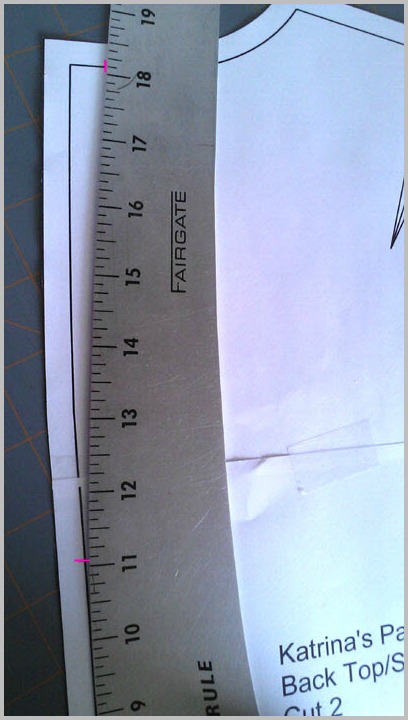
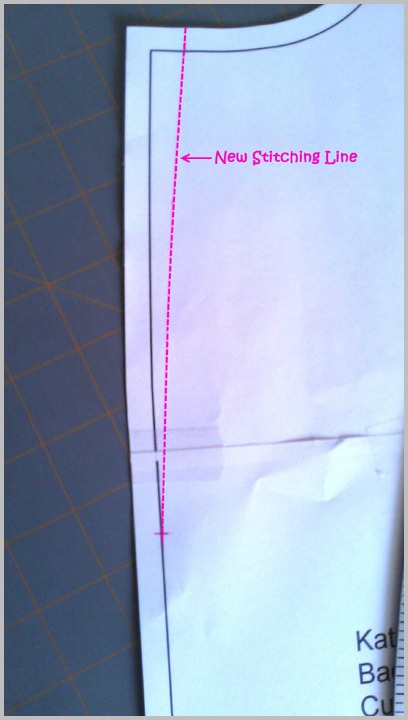
Using a french curve or curved ruler, draw your new line, making sure to smoothly blend your new line with your original stitching line.
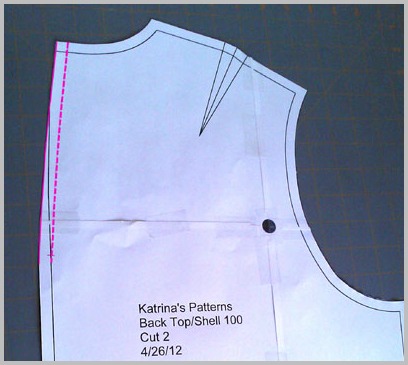
Add Seam Allowance. I use 3/8″ seam allowance, but you can use whatever you’re comfortable with.
Trim the excess paper.
Have you ever had to make this type of alteration to your plus size pattern? Let me know in the comments.
Thanks so much for the tip. I a.m. made just like you and have had lots of problems even with my computer software . it doesn’t seem two adjust for the upper back curve.
I also really appreciate the tips on balancing patterns. No they didn’t teach me that n pattern making classes either.
You’re welcome, Mary. Unfortunately, computer software can only do so much-but it’s good to have.
I’m glad the balancing patterns info was helpful to you. Balanced patterns really make a difference in the way clothes fit and feel.
Thanks for stopping by!
I’ve been wondering how to do this for my daughter who has a stooped neck/back – from always peering at the computer, whatever. Ah well, no more back pieces
Hi Katrina
By reducing the back neckline (i need that too) do i understand that from now on there would always be a seam in the back? No more backs cut on a fold?
Also can you tell me if the patterns drafting softwares are worth the price, lets say Garment designer or others. Have you trried that?
Yes, Andrea, your back would always have a seam, no more cut on the fold.
As for pattern drafting software, I use PatternMaster Boutique from http://wildginger.com and it is definitely worth the price ($225 the last time I was on their site). If you haven’t already, you can get an inside look here:
https://katrinakaycreations.com/?p=148
https://katrinakaycreations.com/?p=304
https://katrinakaycreations.com/?p=314
For more information and to download a free demo check out their Web site. I’ve never tried Garment Designer, but check to see if they have a demo so you can see it in action.
Just a quick note, just because the software allows you to enter your measurements doesn’t mean you’ll get a perfect pattern. I still had to alter my basic pattern but the changes were minor.
If you have any questions about PatterMaster Boutique, I’d be glad to answer them for you.
This is for Andrea. No you don’t always have to have a seam. Instead of going down the 7″, go down all the way to the bottom of the pattern in effect creating a dart. Then you have a straight line that you can put on the fold. Ant circumference that may be lost you can add at the side seam if you need it. Hope this helps.
I just found your blog and I haven’t read all of it but this post is awesome.
Thank you, Mary Beth. Welcome!
Will give it a try, got lots of muslin laying around from quilting days. Thank you Rev. Mary
My neck and armhole is not as large most patterns give. My waist is larger than my bust and my backside we will not talk
about . Needless to say I can not find a pattern to fit.
Hi Rev. Mary, drafting your own patterns may be your best option. Commercial patterns are made to fit bodies that are perfectly proportioned, which most real bodies are not – I know mine isn’t.
Here’s a good resource, which I’ll be talking about in my next post (tomorrow) for drafting your own bodice pattern. This is from a Threads Magazine article and it’s FREE.
Here’s the link
http://www.threadsmagazine.com/item/29753/a-fast-look-at-pattern-drafting
Don’t let the video overwhelm you because it goes really fast. Under the video you can download her step-by-step instructions for measuring and drafting your bodice pattern.
I hope this helps.