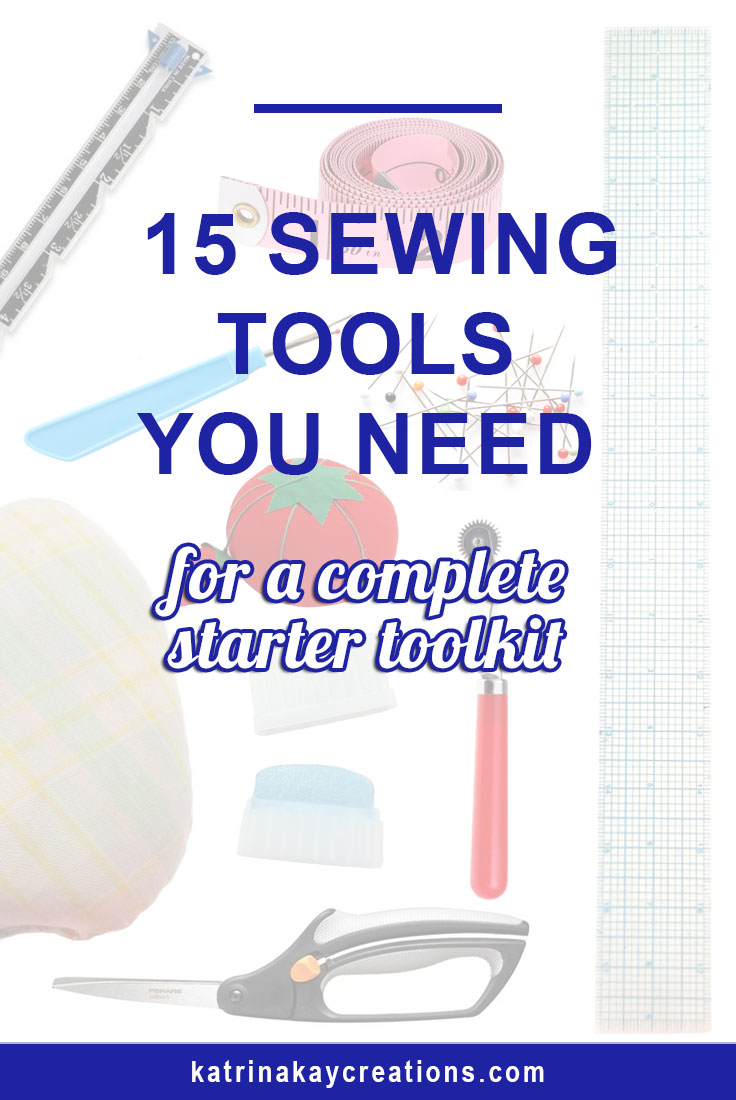
 As a sewing beginner, you don’t have to have every sewing tool ever sold in your toolkit. Depending on what type of sewing projects you start with, some sewing tools you just won’t need right away. You can add tools to your sewing kit as you need them. So what sewing tools should you start out with? Today, I’m going to tell you about 15 sewing tools you need for a complete toolkit.
There are obvious tools, like a sewing machine and a good iron, that are absolutely essential. You need them immediately, of course.
The 15 sewing tools listed below are tools that will give you a great start and take you a long way in your sewing journey. And some of these sewing tools don’t have to be bought often or more than once, unless you lose them.
When I started sewing, I tried to sew without some of the right sewing tools to save money and what I thought would be saving time. Many sewing projects later, I realized that was a mistake. I could’ve saved time, money and effort if I had just invested in the right sewing tools from the beginning.
The right tools for you may not be every tool on this list. It really depends on what kind of sewing projects you’ll be starting with. But if there is a tool that is essential to the success of your project, then that’s the tool you need to invest in even if it’s not on this list.
We don’t want our sewing projects to look homemade. We not only want them to look professionally made but we also want to enjoy the process of making them. Investing in the right sewing tools for your projects will help you do that.
Here are the 15 Sewing Tools:
Hand Sewing
If you’re anything like me, you’d love to avoid hand sewing. Like always and forever (no offense to those of you who love hand sewing.) But unfortunately, that’s not possible. There are some projects that will require you to do some hand sewing. Even if it’s as little as sewing a hook & eye to a skirt waistband, you need the sewing tools that’ll at least make hand sewing bearable. Below are 3 basic essentials for hand sewing.
1. Hand Sewing Needles
Well duh, Katrina! I know needles are an obvious tool for hand sewing, but I wanted to share with you this hand needle guide from JoAnn Fabric and Craft Stores. As you know, hand needles come in different sizes and have different uses. This handy guide shows you the types of needles available and their uses. Knowing this information will help you choose the right of needle for your project and for the weight of your fabric.
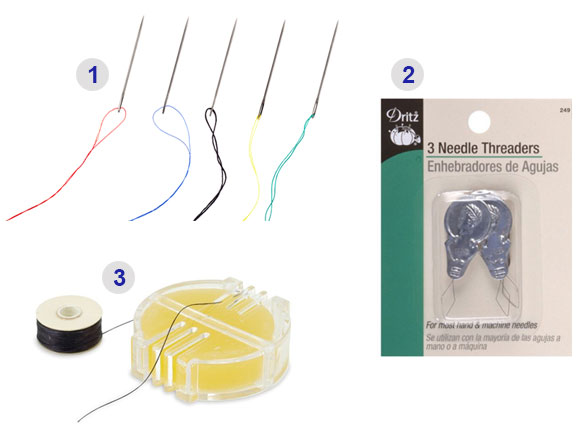
2. Needle Threader
Needles threaders are from very simple to very sophisticated in design and most can be used with both hand needles and sewing machine needles. But they all serve the same purpose, to aid us in getting the thread through that teeny-tiny eye of the needle. Yes, this can be challenging my friend, and may require several tries. And glasses. And a magnifying glass-unless you have a needle threader. The needle threader helps you get that needle threaded the first time. Now, who doesn’t love a tool that saves you multiple tries and eye strain? You can also find examples of needle threaders in JoAnn Fabric and Crafts Stores’ handy needle guide.
3. Beeswax
So, you’re sewing a hem and you’ve easily threaded your needle using your needle threader (above). You’ve made several stitches and you’re moving right along, and then the thread gets tangled. No matter what you do, you can’t get that knot out. Ugh! Now what? You start over, that’s what.
Well, if you’d used beeswax on your thread you wouldn’t have to start over. Coating your thread with beeswax is the solution to tangles, knots and the headaches they cause.
Check the JoAnn Fabric and Crafts Stores’ handy needle guide for more hand sewing tools, like thimbles and needle pullers. As an awkward hand sewing lefty I don’t personally use them, but I hear they protect your fingers from cuts and save them soreness.
Marking
Your pattern pieces are full of symbols that aid you in sewing your pieces together. You may be tempted to skip transferring those symbols to your fabric, like I did in the beginning. If you don’t take the time to mark your fabric you will have problems as you’re sewing your project together. You’ll also waste a lot of time correcting mistakes or going back to mark your pieces.
It’s important to mark your fabric BEFORE you remove your pattern pieces. That way nothing has a chance to move or shift and your markings will be in the right place. Below are 3 tools I use for marking. You can choose those you like to work with best.
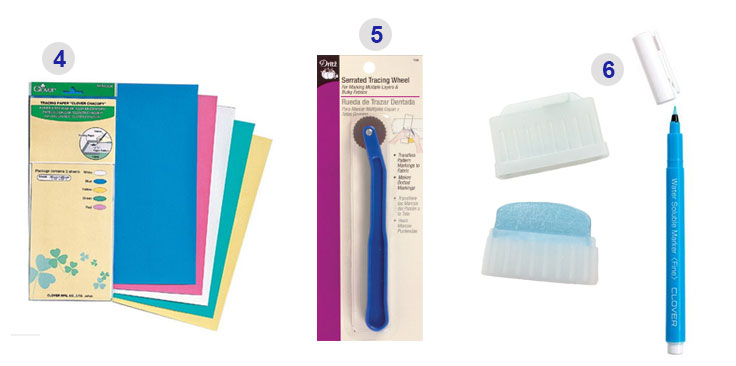
4. Tracing Paper
Most of the time your fabric will be folded in half and you’ll be cutting 2 layers of fabric for each piece. Of course, that depends on what you’re making. This means after the pieces are cut, you’ll have to mark the fabric piece on top and the fabric piece on the bottom. With tracing paper, you can mark both fabric pieces at the same time by slipping it under the bottom layer of fabric and under your actual tissue/paper pattern so it sandwiches your fabric.
Tracing paper comes in a chalky, wax-free finish in multiple colors. You’ll be marking the wrong side of your fabric and you need to choose a color that you can easily see. For light colored fabrics, make sure you don’t use a color that will show on the right side, especially if you don’t intend to wash or dry clean before use.
Tracing paper is best used for marking the wrong side of your fabric because it’ll only come out after washing or dry cleaning.
5. Tracing Wheel
Tracing wheels are used with tracing paper to transfer pattern markings. I use a tracing wheel with a serrated edge, but you can get one with a smooth edge. I prefer the serrated edge because, in my opinion, it transfers heavier markings that easily show up on the bottom layer of the fabric.
6. Tailor’s Chalk, Pencils & Pens
Pencils, pens and tailor’s chalk can also be used to transfer your pattern markings to your fabric. It’ll take a little longer because both fabric layers will have to be marked individually. Some people prefer pens, pencils or tailor’s chalk because their markings are easily removed. In fact, pens with water soluble ink can be easily removed with a damp cloth, as long as you don’t iron over it or wash your the fabric beforehand.
These are great marking tools when you only have to mark one layer of fabric. They’re also good for marking the right side of your fabric for things such as pocket placement or stitching guide lines.
Measuring
Measuring accurately is very important in sewing, so no “eyeballing it” people! You’ll have inches/centimeters on the brain before you know it, as you calculate and become familiar with seam allowances, etc. Below are 3 basic tools you should start with.
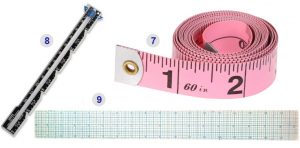
7. Tape Measure
Every seamstress needs a tape measure. I can’t tell you how many tape measures I’ve bought over the years-I’ve lost count. But it’s essential for taking your or someone else’s measurements, as well as measuring lots of other things. Just keep one around your neck when you’re sewing and you’ll never have to look for it.
Some tape measures come with inches on one side and centimeters on the other. They also come in 60 inch and 120 inch lengths.
8. Seam Gauge
The seam gauge is a very convenient tool. It’s a good sewing tool to keep by the sewing machine while you’re sewing or at your ironing station for quick measuring. I use it mainly for measuring hems because you can so easily mark the amount with the little slider and press in your hem as you measure.
You can also use it to quickly mark the amount you need to take in on a pattern piece. Most are only 6 inches long, but you can upgrade to a 12 inch gauge designed by Nancy Zieman. She sells the 5 in 1 sliding gauge that’s 12 inches long and has multiple uses. This gauge is especially useful if you sew more than garments, like quilts or craft projects. But if you don’t need those other 4 functions, the 6 inch will meet your needs.
9. See-Through, Straight Edge Ruler
For beginners I highly recommend the 18″ Dritz ruler because you will get a lot of use out of it. Marking seam allowances on pattern pieces, especially straight lines, will be a piece of cake with this ruler. There will be some instances in sewing where you’ll need a “see-through” ruler to draw parallel or perpendicular lines. This ruler is perfect for that. It’s also good for making pattern alterations. As long as you use it properly and don’t lose it, you’ll have it for many years.
Pinning
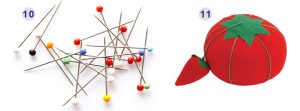
10. Straight Pins
Pins will play a huge part in your sewing. I know some sewing experts suggest that you don’t use pins for cutting or sewing. But as a beginner, I recommend you use pins. They are not the enemy and are very good at holding things in place while you cut and sew. And the sharper your pins are the better.
Don’t be sucked into buying pins because they’re a certain color or have a cute head in some cute little shape. Buy them because they’re functional, go into and come out of your fabric with very little effort and don’t snag or pull your fabric.
11. Pin Cushion
The reason I say a pin cushion, or if you prefer a pin magnet, is necessary is because they keep your pins at your fingertips as you sew. They also stop your pins from rolling under your sewing machine on onto the floor. There’s nothing worst than spending the limited time you have to sew looking for pins or anything else. A pin cushion next to your sewing machine or on your wrist is not only convenient, but helps you grab a pin or 2 without a major interruption to what you’re doing.
Optional: Pattern Weights
Pattern weights are a good thing to have, but I find the weights offered by fabric stores to be a little pricey and too light.
As a beginner I recommend you use weights in addition to pins if you want to use as few pins as possible. But there are cheaper products you can use from home improvement stores and get a lot more in one package than the 6 or 8 offered by fabric stores.
Read: Patternmaking Tools That Won’t Break Your Budget, Part 1 for more information on inexpensive pattern weights.
Pressing
Everywhere I talk about pressing, I can’t stress enough how important it is to the success of your final sewing project. The tools below will also help you get good results. As a side note, if you’re not going to be sewing garments right away, you probably don’t need to invest in a seam roll or a tailor’s ham right away. But for garment sewing, these tools will give you great pressing results.
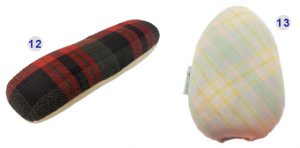
12. Seam Roll
I sewed for many years without a seam roll. Now, I use it all the time. Did you know your sleeves aren’t supposed to have creases in them when you press them? Who knew, right? Well creases are easy to eliminate when you use a seam roll.
I also use my seam roll for flattening my seams and pressing any type of tubular piece. When you press a tubular piece, it stops the imprint of the seam from sewing on the other side of the piece like it would if you pressed it flat. Seam rolls are also cheaper than sleeve boards, which is something you can upgrade to later.
Both the seam roll and the tailor’s ham (below) have a different fabric on each side. The cotton side is for pressing fabrics that require your iron to be at a high temperature. The wool side is for pressing fabrics that require your iron to be be at a low to medium temperature.
13. Tailor’s Ham
Yes, that pressing tool that looks like a ham is necessary when you press areas of your garment that will fit curved areas of your body. The ham’s rounded shape helps you mold your darts or princess seams, or any type of curved seam, so they’ll fit better on your curves. You’ll probably only have to buy a ham (and the seam roll above) only once because they are very durable. You can also make your own with a DIY tutorial.
Cutting
I must admit, this is my least favorite part of sewing, but there’s no getting around it. So, you might as well make sure you have the best cutting tool possible.
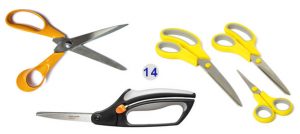
14. Scissors
Sewing scissors are sacred. (I bet you can’t say that 5 times fast!) They have to be protected from your family members because the non-sewing world does not understand that sewing scissors are NOT to be used to cut anything but fabric. NOT paper, NOT cardboard and definitely NOT packaging. NEVER. Don’t waste your time explaining this 1,000 times because they will NEVER understand. EVER.
Okay, now that that’s out of my system, scissors don’t have to be top of the line to be good. As a lefty, I’ve gone through a lot of scissors because many were very uncomfortable. It’s very important that your scissors be comfortable because you will use them a lot. There’s no need to make the cutting experience any harder than it has to be.
The scissors I use now are actually for left and right handed people. I was really surprised these cut right and were comfortable, but they do and I’ve used them for years. Scissors can get expensive so I really like the price as well.
Ripping
15. Seam Ripper
You could use scissors to rip seams, but it will take you much longer than using a seam ripper. You will love your seam ripper because it does the job so well, but you will also hate it because you’re going to need to use it so much.
Seam rippers come in different sizes and it’s a good idea to have more than one because they tend to walk away. (That has to be the explanation, right? We can’t be losing seam rippers that often.) In my opinion, the seam ripper is right up there with the sewing machine and the iron-as far as essential tools go.
Fabric stores sell starter sewing kits which are great for sewing beginners. They have the basic sewing tools beginners need to get started so you may even be able to start sewing with less than I have listed in this post. You should definitely compare their prices to see what’s easiest on your budget.
Having these sewing tools will not magically make you a sewing expert. In fact, you’ll probably learn more from your mistakes than from your sewing triumphs. But they will get you off to a good sewing start and help you do each sewing task in a way that’s less frustrating and more productive.
Do you have a favorite sewing tool that’s not on the list? Share it with us in the comments below.


Hi Katrina,
Wow, this is a really complete beginner’s list. There is nothing missing in it and anyone who wants to start their adventure with sewing will find all the necessary sewing tools here. We sincerely appreciate your work and wish you success.
We will be grateful if you evaluate our original sewing patterns: https://www.ministryofpatterns.com/ct/sewing-patterns
Cheers and happy sewing!
Thank you for taking the time to comment, Ministry of Patterns. I will take a look at your website.
I never thought of putting beeswax in my sewing box. Thanks for the great tip!
You’re welcome, Maureen.
I mostly use a small rotary cutter for long seam ripping, after using seam ripper or small scissor blade to start. Is a dress form a good idea? I tried making one years ago as advertised in Threads. Didn’t like how it came out. It just showed slumped posture. . .I’m working on that. I made all my own clothes from scratch before children. Store bought never fit well and needed lots of alterations also. Now that my body has shifted and I would like to make street clothes again, what do you recommend for a dress form, for an older lady. I just need to make things fit better. I have purchased lots of modern fabrics and patterns at hefty prices to make things, Just not sure enough to cut and sew. I would rather use fabric in clothes than to throw it away.
A dress form that’s a duplicate of your body is very helpful for fitting purposes. The others are good to have but won’t help you with fitting your unique shape that much. You can read my review on different methods of making your own, here: https://katrinakaycreations.com/5-diy-dress-form-tutorials-solo-fitting/.
I love to sew but have not been able to for a few years…now getting back into it. I actually bought a dress form because I need fit now that I am older and patterns do not fit as they use to when I was young and slim. I also have acquired most of the other things except the pressing ham and roll. I am glad you suggested these; perfect for curved seams and sleeves. I am very glad I came across your site. I want to sew more professionally and try new techniques and new fabrics. I appreciate that you want to share your knowledge.
I love sharing my knowledge, Jessica, and I’m really glad to have you here. If you want to be a part of a community of sewists, and you’re on Facebook, join my group, The Sewing Curve. We’re a very helpful community who don’t mind answering question and sharing our sewing experience. You can join here: https://www.facebook.com/groups/thesewingcurve/.
Thanks for the update. I use to sew all my and my children’s clothes. Since the kids are grown I’ve decided to go back and enjoy the creation again. I am starting with a dress form. And found your insight valuable. I was able to aquire an older version and an utilizing it as a base. Thanks for all the help.
You’re welcome, Laura. I’m so glad you’re sewing again. I wish you well!
I mostly use a small rotary cutter for long seam ripping, after using seam ripper or small scissor blade to start.
Is a dress form a good idea? I tried making one years ago as advertised in Threads. Didn’t like how it came out. It just showed slumped posture. . .I’m working on that. I made all my own clothes from scratch before children. Store bought never fit well and needed lots of alterations also. Now that my body has shifted and I would like to make street clothes again, what do you recommend for a dress form, for an older lady. I just need to make things fit better. I have purchased lots of modern fabrics and patterns at hefty prices to make things, Just not sure enough to cut and sew. I would rather use fabric in clothes than to throw it away.
Katrina, thanks for your comment about how you should have high-quality needles when you being sewing. I like how you said that you should have a tool that helps you to mark on your product as well. My mother loves sewing, so I am looking into getting her some new supplies that are necessary for her to continue her hobby.
You’re welcome, Ashley. I’m sure your mother will appreciate new sewing supplies very much.
I can completely relate to the whole hiding your scissors from your family part. It’s true they really don’t understand. Lol.
No matter how many times you try to explain, they still don’t get it. Thanks for commenting, Stephanie.
I prefer a small rotary cutter for ripping seams.
I also prefer the new scissors where both holes are large, they prevent my thumb from getting stuck in the smaller hole of most scissors.
Yes, comfort is necessary when it comes to sewing tools. Thanks for sharing.
how much is the complete 15 starter tool kit? Can you also give the breakdown of the price?
Hi Richard, these are sewing tools I recommend for beginners. Unfortunately all 15 don’t come in one sewing kit. There are sewing kits that have some of these tools, but not all. They can be found at any fabric/craft store and the prices vary. Otherwise, these tools would be sold separately.
I have links to some of the tools in the blog post. You can also see the prices. It’s probably most cost effective to get a starter kit for one price and add the other tools as needed.
I wished I had found you years ago! You’re such a good teacher. Thank you.
Thank you, Helen. And thanks for taking the time to comment.
Before I start sewing anything, I arm my right hand with thread snips. They nestle quietly inside my right hand are at the ready whenever I have to make a quick snip. It’s like my index finger is a snipper. 🙂
That’s such a good tip Rachel. I’m always looking for my thread snips and they are a very handy tool. Thanks for sharing.