 In Lesson 1, we learned how to manipulate or move darts using the Slash/Spread and the Pivot Method. In Lesson 2, we learned how to combine darts to create new designs using the same methods. (If you haven’t looked at the tutorials for Lesson 1 and 2, do that now and come back to this lesson.) Not only can you move darts and combine darts to create new styles, but you can also change darts to seams. So in our final lesson today, I’m going to show you how adding seams in patternmaking, in addition to other design features, can be done without being complicated. These seams are also referred to as style lines.
Related: Combining Darts in Patternmaking, Lesson 2
Like Lesson 1 and 2, I’ve included a worksheet so you can practice what you learn in today’s tutorial. So, let’s get started!
In patternmaking, you can use darts to create seams or style lines, but you don’t always have to.
Adding seams in patternmaking does not always require you to change a dart into a seam. For this tutorial, we’ll simply draw the seam line on our pattern after we close any unnecessary darts.
In this lesson, we’re only using the Slash/ Spread Method because the more complicated your design gets, the more confusing it becomes to use the Pivot Method.
Analyze any style you’re trying to create from your sloper using the three C’s: Compare, Consider and Compose
Compare
In the design, are the darts the same as your sloper? For example, does it have shoulder darts? Waist darts? Etc.
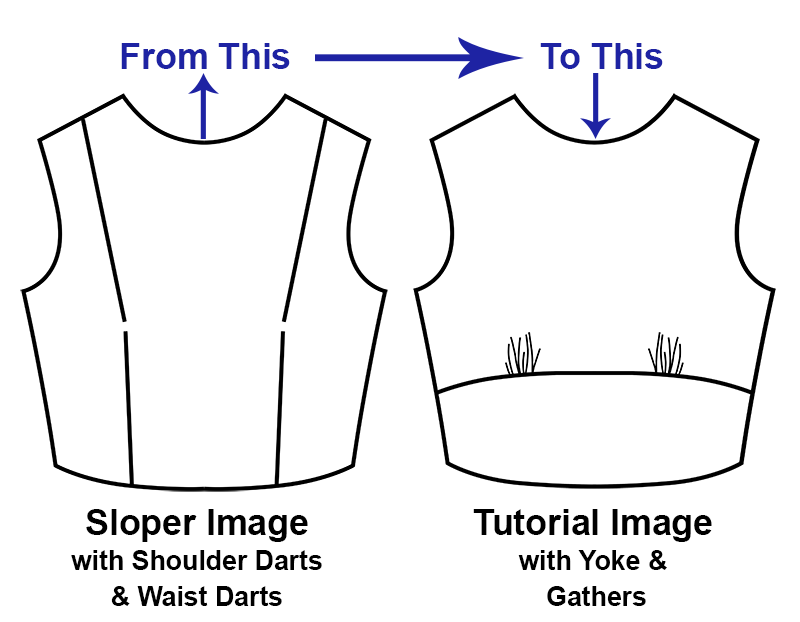
How is the sloper on the left different from the design on the right? Click the image to enlarge.
Consider
If the darts aren’t the same, have they:
- Been moved and/or closed?
- Combined with another dart?
- Changed to another design element like pleats, tucks, gathers, seams, etc.?
Keep in mind, it doesn’t have to be one or the other, it could be a combination of numbers 1, 2 & 3.
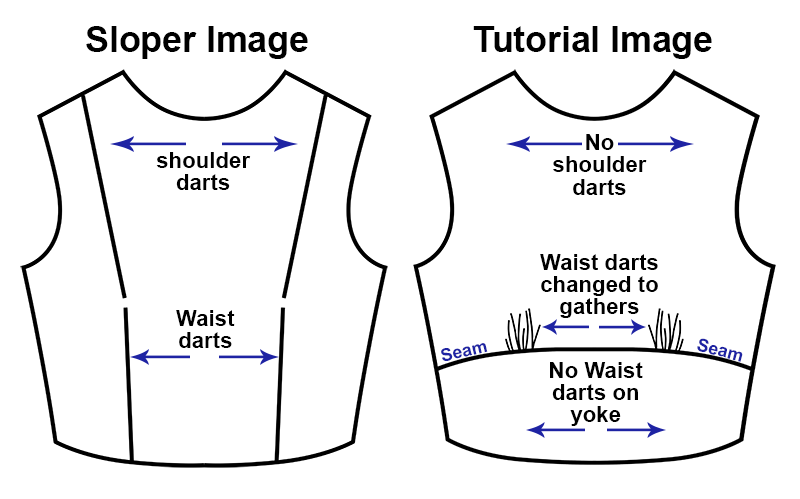
Consider the differences between the sloper on the left and the design on the right. Click the image to enlarge.
Compose
Now it’s time to create a plan of action. Where should you start? What should be done first?
Below is a plan of action for this example. Remember, you’re transforming your sloper image into the tutorial image.
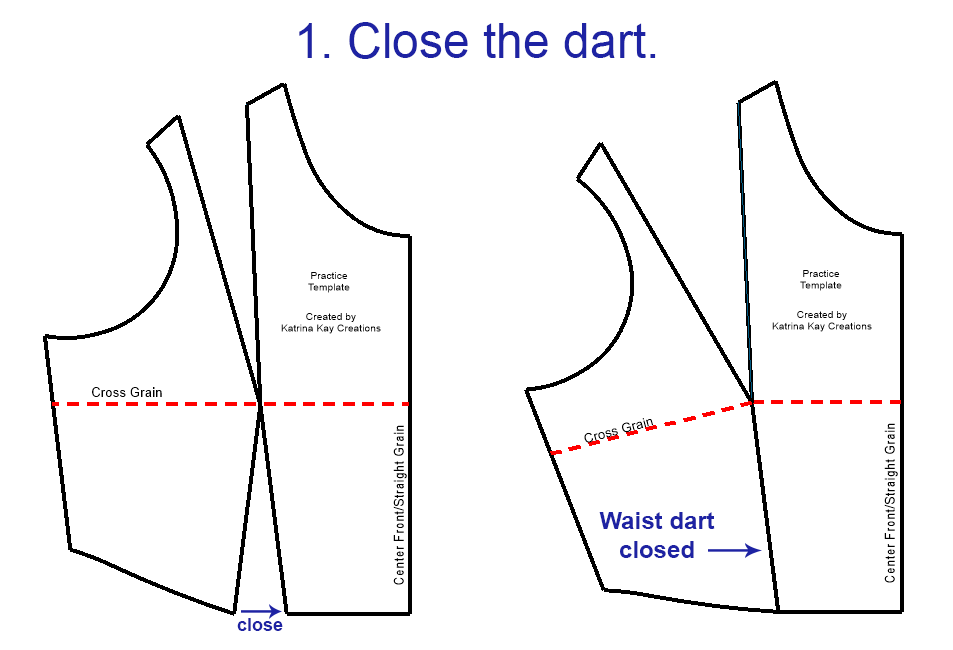
1. Close the dart that the new seam line for your yoke will be crossing.
- In this example, closing the waist dart actually combines it with the shoulder dart and helps you to draw in a nice, smooth yoke line while getting rid of the waist dart BELOW the yoke line. Remember to tape the lower part of the waist dart closed BELOW the yoke line placement.
2. Draw in your seam or style line.
- On our piece the seam line is also our yoke line. Remember to cross mark the placement of your notches so both pieces, the top piece and bottom yoke, will be marked.


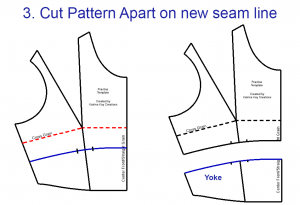
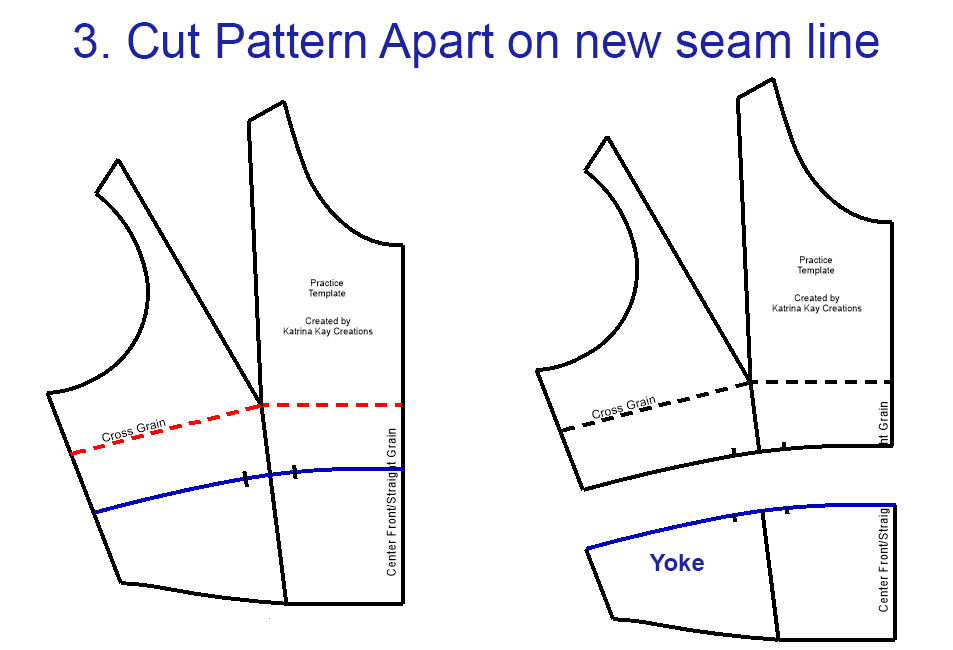
3. Cut the pattern apart on the yoke line.
- Because this will be 2 separate pieces and we need to finish the top of the pattern piece – we still don’t have our gathers – we need to cut our pattern piece apart on the yoke line.
4. Add additional style features to your pattern piece by moving or closing the dart that remains, when necessary.
- On our piece, we can create our gathers by closing the shoulder dart, which we don’t need. This gives us the opportunity to turn the upper part of our waist darts into gathers.

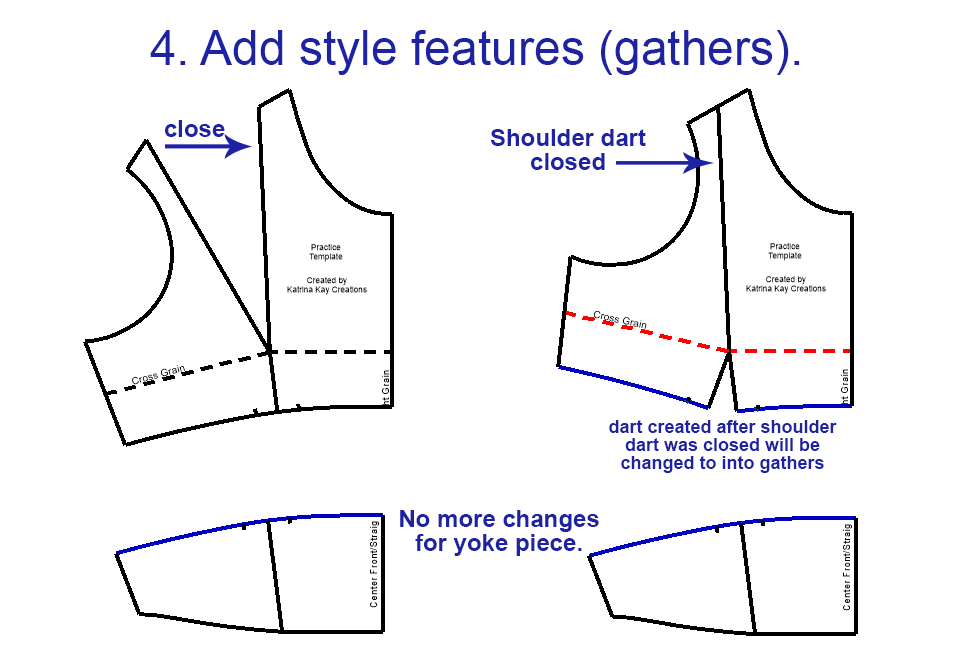
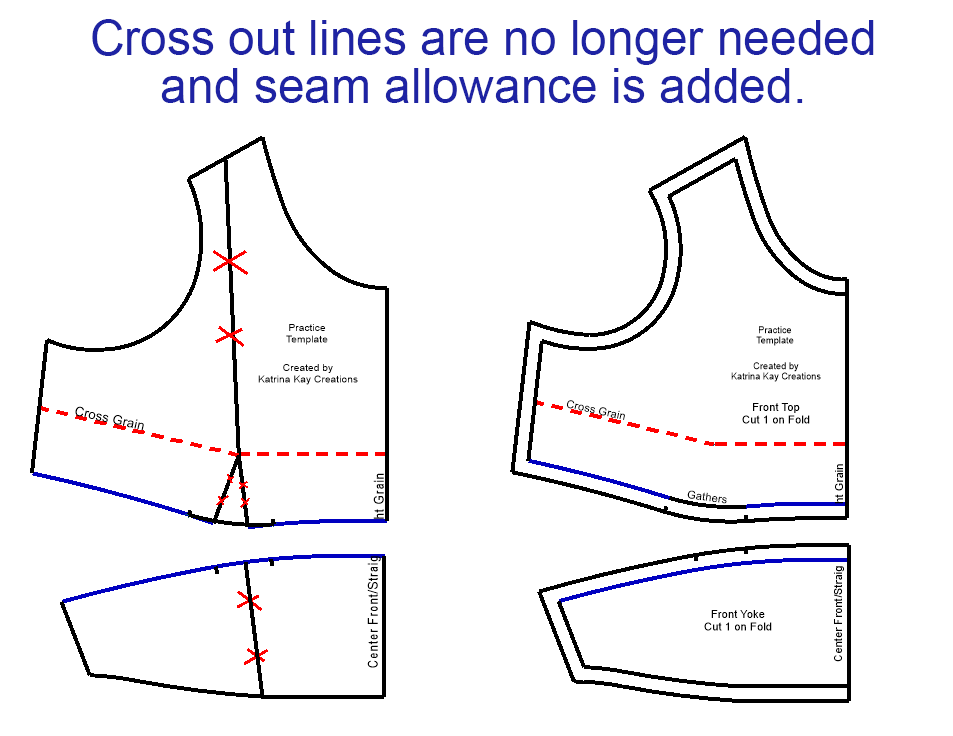
- Your final piece will look like this when finished. On the left I crossed out the lines we no longer need. On the right I’ve added seam allowance to our piece.
Every style is different, but this gives you a place to start when creating a new design from your sloper.
Be sure to look at the video tutorial to see exactly how I created this style with the pattern template/sloper. And don’t forget to download your worksheet so you can practice!
Adding seams in patternmaking isn’t a complicated process, especially if you start simple. Will you try this on your own patterns? Let me know in the comments below.
So grateful that I found this very helpful video. Thanks for having the passion to share your knowledge on pattern making.
You’re welcome, Loreta. I’m glad to share.
Wow, Katrina, these videos are great and you’re a terrific teacher!! Thank you!
I can’t seem to master creating basic slopers for clothes that will fit me. I’m sure I’m not measuring correctly. I sure wish you would do a video on creating basic slopers. So much easier watching videos than reading written materials, but I will try the book you recommended. Any other tips?
Thanks again!
Lesa
You’re welcome, Lesa.
I don’t have videos for creating a sloper, but I do have an online course for creating a top pattern that fits that you can then use as a sloper to create more patterns.
Enrollment is closed right now, but you can join the waitlist here: https://katrinakaycreations.lpages.co/sffwl/ to be notified when enrollment opens again.
I have a great big book used by college students for patternmaking. It includes a lot of information on changing and moving darts, but you surely have simplified the thing especially by adding the videos. Nice work.
Thank you, Kay. I’m glad the videos are easy to understand.
Hello katrina! I graduated from esmod school in 2010, but I must truly admit that those 3 simple lessons helped me to understand the tricks of the darts far more than this 3 -year -graduation -school! 🙂 thank u so much for ur time with us . I will be checking every tutorial from ur professional site ! Wishing u all the success in your career
As a beginner, I wanted to know the basic steps and more about pattern making as well as sewing. So, I went through Internet to find some tutorials to improve my ability. Luckily, I found your Website.
I like to say that I was amazed with your valuable tutorials and you are a very good teacher who can explain and teach the techniques well for beginners like us.
Thanks a lot and keep it up madam. I wish you all the success for your career.
Thank you so much, Sriyani! That’s so nice of you to say and I’m really glad my teaching was clear enough for a beginner. I always try to keep beginners in mind when I create a tutorial. Thank you for stopping by and I appreciate your comment.
I know you have heard this before, but I must say it again. Your a great teacher & I thank you so much for taking some of the mystery out of pattern making. I may just be able to pull this off with your help.
I look forward to any and all of your lessons.
grateful
Sonya
Thanks so much for saying I’m a great teacher, Sonya. It makes my heart glad to be able to make patternmaking understandable. It was a mystery to me also, and it seemed no one wanted to teach it. So I had to go to school and learn, not knowing I’d be able to share my knowledge one day. I’m so sure you’ll be able to pull it off. It’s just like sewing-if you take small steps and practice, you’ll get better and better at it. Let me know how it goes and thanks for your support.
Hi Katrina,
Yes, I agree with all the above comments. You are a great teacher! Thank you for sharing your expertise & knowledge with us. I look forward to learning more! To
Thank you so much, Loretta. I look forward to teaching more because this is what I enjoy. Thank you for all of your support.
Katrina, congratulations in a truly informative and user-friendly series. You definitely have a gift for teaching and I look forward to more learning experiences with you in the future. I have been sewing for almost 55 years and I am still learning thanks to folk like you who so generously give of their time and expertise. Thank you so very much for all you do for all of us – your students!! Vicki from Down Under.
Thank you so much, Vicki. I truly love teaching, so reading your comment put a huge smile on my face. 🙂 I’m glad to share my time and expertise with such supportive people like you. One thing I’ve learned about sewing, you never stop learning. With 55 years of sewing experience under your belt, I’m sure there’s PLENTY you can teach me. Thanks again for your comment.
Changing darts to seams is excellently explained! Thank you so much!!!
I’m so glad to hear that, Sandra. I’m always hoping I explain sewing and patternmaking techniques in the most understandable way possible. Thanks for stopping by!
Your tutorial on darts was very informative. You are a great teacher. Looking forward to more lessons!
I’m glad you found the tutorial informative, Bonnie. I love teaching so you have given me a wonderful compliment. Thank you!
This series has been a very valuable learning experience, Thank you so much. I learned so much.
Yay! I’m so glad to hear that, Nancy. I hope it will help you in your patternmaking endeavors. Thank you for you for watching the series.