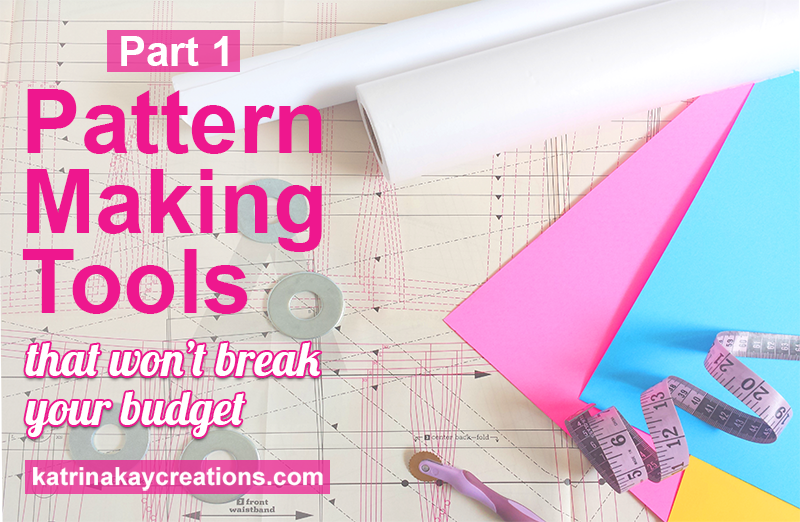
 Hi, Everyone! I’m going back to the basics with this post and the next one (Part 2). For some of you, this will be a refresher on patternmaking tools. For those of you new to patternmaking, this will be new information. But whatever your patternmaking skill level, you don’t have to have the most expensive tools to make or alter your own patterns. You can start with the very basic, some of which you may be already using in your sewing, and upgrade in the future. Today in Part 1, I’ll be talking about 4 of 7 patternmaking tools that won’t break your budget. I’ll tell you where to buy them, what I like about them, what I don’t like about them – if anything, and approximately how much they cost. All of these are tools I both started out using and/or use now.
Keep in mind, there are a lot of patternmaking tools out there. The good news is, you don’t have to buy them all at one time. Use the patternmaking tools in this post (and my next post coming on September 30th) and get the rest as you go.
*Note: All prices and products are correct at the time of this posting, but are subject to change. These are all things I use, but I encourage you to shop around and compare prices. And make sure you use those fabric store coupons and take advantage of sales.*
Here they are, 4 of 7 patternmaking tools I’ll be talking about this month.
1. Paper
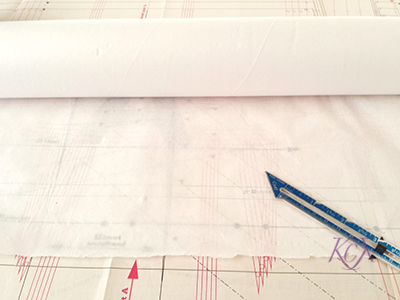
I personally don’t like the tissue paper used by commercial pattern companies because it’s too fragile. I’ve often traced my commercial pattern onto paper that will allow me to make alterations without ripping it up and is forgiving when I have to re-tape something. There are several different kinds of pattern papers on the market, sold within the sewing/fashion industry and outside of the industry. I don’t like to spend a lot of money on paper because I know I’ll have to buy it over and over again. Here are the 2 papers I use:
-

Banner paper used for parties and other celebrations, also great pattern paper.
Banner paper: This paper is used to create banners for parties and other celebrations, but it’s also great for patternmaking. I like it because it’s white, which makes it easy to see pencil markings. It’s not fragile, like commercial pattern tissue, so your patterns will hold up better with lots of use.
Use this paper to copy and preserve your commercial tissue patterns, trace PDF patterns onto it or make your own patterns.
Because banner paper comes on a roll, when you unroll it to use, it curls back up. This is what I don’t like about banner paper. I usually roll it in the opposite direction a couple of time to get it to lay flat. I also don’t like that you can’t see through it to match seams and markings like you can with tissue patterns, but that’s something I can live with.
*Note: I converted feet into yards for those of us who only think in yards. 🙂
What: Banner paper
Where: Buy at Walmart, (Also, check in store)
Cost: $2.53+ for a 30 in x 30 ft roll (30 feet equals 10 yards)
I used to buy banner paper at office supply stores, but I’ve noticed their prices have gone up a lot. I would get a 30 in x 72 ft roll (72 ft equals 24 yards) for $8. In my research for this post, I found they charge more and give you less, so make sure you shop around.
-
Paper used on exam tables in the doctor’s office, also great pattern paper.
Medical Paper: This is the paper used in the doctor’s office to cover the exam table. I like this paper because you can see through it, but it’s not as fragile as commercial pattern tissue. So with this paper it’s easy to place one pattern piece on top of the other and match seams, etc. Also, when you unroll it, it doesn’t curl back up.
The use for this paper is the same as banner paper, above.
I started using medical paper this year and so far, so good. I haven’t found anything I dislike about it yet.
What: Medical paper
Where: Buy on Amazon
Cost: $10.50 for a 21 in x 225 ft roll (225 feet equals 75 yards)
As mentioned earlier, prices are subject to change. The night before I published this post, the prices on both papers had changed. The Walmart banner paper was more while the medical paper price was less.
2. Poster Board

Multi-colored poster board used for tracing/copying sewing patterns.
Oak tag (like poster board but heavier) also called manila paper, is used in the fashion industry for slopers so that you can quickly trace a sloper onto paper. Lay it on the paper, draw around it with your pencil, include markings necessary for sewing and voila! The sloper is traced and ready to go.
But oak tag is expensive and buying it wholesale is out of the question because the roll would be too heavy to lift onto the table. And I know my little ole’ cutting table would not be able to take the weight of it anyway. A better solution for those of us who don’t use industrial cutting tables is poster board. It’s lighter, cheaper and easy to get.
Poster board is not only good for tracing slopers to design your own patterns, but also for prolonging the life of your favorite commercial patterns. Again, that tissue pattern is fragile. And when you finally have a pattern that fits, you want to use it over and over again. Trace it onto poster board and you’ll always have it to use as a sloper, to trace it onto fabric or trace it onto paper and change a design feature. I show you how to do this in this post.
What: Poster board
Where: Buy in discount stores like Walmart, Target and some dollar stores
Cost: Varies, depending on store
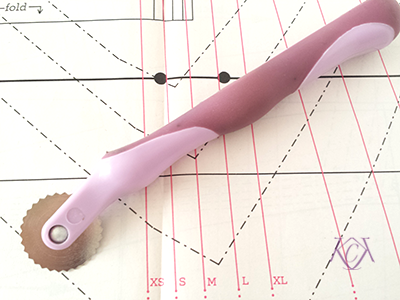
3. Tracing Wheel (Serrated Edge)
Tracing wheel with a serrated edge used for tracing sewing patterns.
If you’ve been sewing for any length of time, you probably have one of these in your sewing tool box already. I love when you can use one tool for more than one purpose. Don’t you? A tracing wheel is not only great for transferring lines and markings onto your fabric, but also onto your pattern. I specifically mention a tracing wheel with a serrated edge because it puts subtle indents into the paper that act as a guide for drawing your lines or markings.
I also use my tracing wheel to assist in folding my pattern on a dart or pleat line. Remember those subtle indents I mentioned? They also act as perforations on the line you need to fold and makes folding directly on that line super easy. (I show this in the video.)
What: Tracing wheel
Where: Buy in fabric and craft stores
Cost: Less than $2, depending on the brand and store (some do cost more)
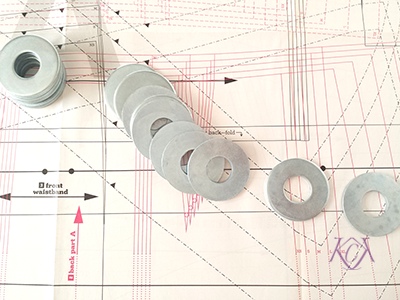
4. Weights
Home improvement fasteners make great pattern weights.
Years ago, I bought weights from the fabric store, wishing there were more than 6 in a pack. (The weights I saw recently were only 4 in a pack.) I used them all the time and misplaced them a couple of times so I decided to put them in a place where they would never get moved or lost again. I have yet to find those weights because, unfortunately, I hid them too well.
The next time I bought pattern weights, I got them from Home Depot. Fasteners work great as pattern weights, as well as other tools from home improvement stores. They’re easy to stack if you need them to be heavier. You can “dress” them in the colors of your choice or leave them as is. And you can get a lot more than 6 and buy them by the box.
What: Weights (The home improvement store calls them fasteners)
Where: Buy in home improvement stores, like Home Depot or Lowe’s
Cost: Approximately $6 for a box of 20
Stay tuned for Part 2 on September 30th where I’ll talk about the last 3 patternmaking tools that won’t break your budget. I’ll also be doing a review of my new favorite tool that you’ll definitely want to put on your wishlist. 🙂
Don’t forget to check out the last 3 budget-friendly patternmaking tools in Part 2.
Do you have any budget friendly patternmaking tools you use? I would love to hear about them in the comments.
Katrina – just came across your site and love all the tips you have. I also use the ‘large’ washers from a home improvement store – but found out that they weren’t heavy enough; so I used E6000 and glued three of them together. Then I took grosgrain ribbon that I had lying around and covered the washers with them. The end result was fantastic – 3 stackable washers and the grosgrain ribbon keep them in place without moving around.
Wow, that’s such a great idea. I have some washers I haven’t covered yet. I’ll have to try gluing 3 together. Thanks for the tip, Donna.
Great site, Katrina, lovely so many folk want to share :~)
I use lining paper for pattern making, here in England I get it in Poundland which
is equivalent to $ store.
For flimsy fabric I use mini bulldog clips again from Poundland
Hi Lucy, is lining paper like the paper you use in the kitchen? Just curious. The bulldog clips are perfect for holding flimsy fabric. I never thought to use them. Thanks so much for sharing.
Doctor’s office tissue paper . . . . INGENIOUS!!!!
I am about to trace out a Minoru pattern. This was right on time. 🙂
Cheers,
Lyric
Oh, yeah, Lyric. Medical paper would be perfect for tracing your pattern. I’m glad you were able to use this information. Happy sewing!
These are great tips. For weights I use baking beads in paper cupcake liners. I love it when things can do double duties – baking pastry one day and holding down patterns the next. I think that using sewing weights has sped up my sewing 100%.
I never thought about using something baking related for pattern weights, Wendy. My mother bakes so I’ll be taking a second look at her baking tools, lol. Why spend the extra money when you have something right in your kitchen-I love it! Doing things fast in the sewing room is necessary since we never seem to be able to spend the kind of time we want to spend sewing. Thanks so much for sharing.
For paper, I use Christmas wrapping paper with the grid lines printed on the back. The grid lines are SO helpful! The only thing I don’t like about it is that you can’t see through it. But on the plus side, it’s relatively cheap, lightweight, and readily available everywhere. (And if you roll your patterns for storage, they are very pretty to look at!) Christmas paper generally goes on sale right after Christmas, so I buy a bunch and use it throughout the year.
Thanks for all the tips Katrina, I appreciate that you are so generous in sharing your knowledge.
You’re so welcome, Nicole. Wrapping paper is such a good idea. I’ve heard people suggest it but I thought it might be too fragile. You probably have the prettiest patterns on the planet. Paper is not something to spend a lot of money on so I love how you save with after Christmas sales. Thanks for sharing.
I have most of these. Large Rolls of paper (from Amazon), tracing wheel (walmart), weights (I usually use soup or tuna cans. One thing I’ve tried with slippery fabric is to use a cardboard cutting board and put the pins through the cardboard. I also hold my hand over the pattern and fabric and trace the pieces and then cut-if the pattern/fabric shifts it’s easier to realign it. I read that press-n-seal (adhesive food wrap) is good to trace a pattern to so you won’t have to cut up a multi-size pattern.
Oh, also. I posted earlier that I had a hard time sewing a straight line sometimes. I narrowed it down to knits. I’ve learned since that time about using ball point needles, stay tape, paper strips, etc. to get better seams. For certain knit garments, I serge the seam first, then sew it about 1/4″ from the serged finish on the sewing machine. The seam sews straight and this reinforces the seam.
Stay tape is a life saver. I don’t seem to have good results with ball point needles, but maybe it’s not the needle but that the seam needed to be stabilized. Hmmm. Good to know, Robin. And thanks for the tip on serging first. I love how we learn from one another.
I thought some of you would have these tools already. I like your use of soup & tuna cans for weights. Whatever works and saves money, right? When I worked for a bridal company, we had to cut slippery fabrics a lot. We would use tissue paper (bought by the roll), roll it out and lay the fabric on top. It kept the fabric nice and stabilized. But if you’re not cutting slippery fabrics a lot, you probably wouldn’t want to invest in a whole role of tissue paper. I hadn’t heard about press-n-seal. Good tips, Robin. Thanks for sharing.
I have been using brown paper bags and craft paper for years. To get any wrinkles out or to stop it from rolling back up on it’s self I just iron it and it is flat as a pancake. I also iron all my tissue patterns before using, if there is a tissue pattern I think I will use a lot, I just get out a can of basting spray and glue it down to poster board then cut it out. I Don’t use spray glue because if the pattern sticks to itself while you are laying it down it is then destroyed.
Craig
Pressing kraft paper makes it flat as a pancake? I’m definitely trying that with my banner paper. I never thought of that. And thanks for the basting spray tip. I’m going to do that too, instead of stapling. Great tips, Craig! Thanks for sharing.
The fasteners you mentioned I’ve been using for years. Only… I thought they were called heavy weight washers. I had found them in my dads tool box after he passed and thought, hey, these would be good to hold my fabric in place while cutting. Thank you for sharing all your sewing knowledge with us Katrina!
Yeah, Loretta, I thought they were washers too. I guess it’s pretty much the same thing. I have to try them for holding my fabric. I didn’t think about that until I did this video.
I’m glad to share. Thank you for your support.
Great post! I use brown kraft paper I purchase from Amazon. The roll is comes in different widths, I use the 30″ x 300′. It last forever and it’s wide enough for my plus sized patterns pieces.
I also use large washers for pattern weights! They are the best.
Bonnie @ http://www.sewplus.blogspot.com
Bonnie, I used to use brown kraft paper but the pencil is hard for me to see. I talk about it in the video but yes, that works great as pattern paper too. And 300′ is really good. Thanks for sharing.
I looked at your site and you do great work. I love the green dress and the outfit with the blue draped tank. Very nice!
Very interesting Katrina, I already use some of these! Thank You “sew” much!!
Oh good, Dara. And you’re “sew” welcome.
I love my flexi curve for smoothing out curves. I learned to use it in my landscape design class.
http://www.amazon.com/Staedtler-24-Inch-Flexible-Curve-97160-24BK/dp/B0006IK3LM/ref=sr_1_1?s=arts-crafts&ie=UTF8&qid=1442616610&sr=1-1&keywords=flexi+curve
Ooooh, I like that. I have to add this to my wishlist. I read some of the reviews and it looks like it has many interesting uses. Thanks for sharing, Brenda.
How would you use this flexible curve tubing? I’m not sure how this would be useful in sewing? Please help!…..lol
When altering a pattern or creating one, I usually draw in curved lines free-hand and then use my french curve to smooth it out-make sure it’s not too deep of a curve (or make sure it’s deep enough). This flexible curve tubing can be used the same way. I hope this helps, Loretta.