 Have you ever seen a skirt you really liked but it didn’t come in your size? Or it’s no longer sold by the store? I saw this pleated skirt on Nordstrom’s Web site a few months ago and thought it was so cute, but they no longer sell it. So I decided to challenge myself and copy it. Im almost sure I have a few more gray hairs from making this pattern. But, I think it was worth it. After many versions later, in Part 1 of 2 videos, I’ll show you how to make this pleated skirt pattern. These aren’t your usual horizontal or vertical pleats. Noooo, these pleats are on an angle. Can you say FUN!?
I didn’t make an exact clone of this skirt. I added what I like and left out what my body didn’t need. For example, I left out what looks like a small yoke at the waist because I didn’t want to emphasize my sloping waistline. I also added a little fullness to my skirt to balance out my top heaviness, and made it longer. That’s the beauty of doing it yourself, you can add what you like and leave out what you don’t.

I did a lot of guessing about where the pleats should be placed and how wide they should be. I settled on my pleats finishing at 1 1/2″ wide.
Nordstrom’s Skirt
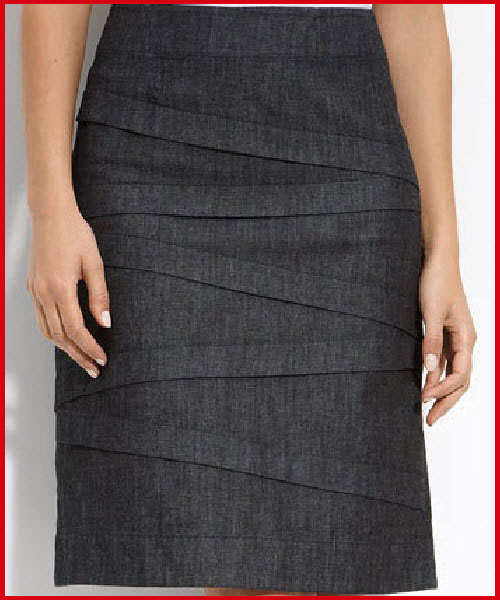
Let’s take a look at Nordstrom’s skirt. (Click all images to enlarge.) It has 5 angled pleats in the front only. The skirt also has a wide top-stitched hem.
The fabric looks like denim, which is what I plan to make my skirt out of also.
I can’t explain it, but I like my denim skirts long, even though I’m rather short. They just feel more comfortable to me for some reason. Nordstrom’s skirt is about knee level.
As mentioned above, it looks like it has a small yoke at the waist, unless that’s the imprint of her tucked in shirt. Or it could be a wide waistband. Either way, my skirt will just have a faced waist.
My Version
On the left is what my finished pattern looks like with the pleats open. (You can see the whole patternmaking process in the video.) Note: the pattern piece in the video is half scale. It’s the only way I could fit the whole piece in the camera frame. On the right is the finished muslin, which is full scale.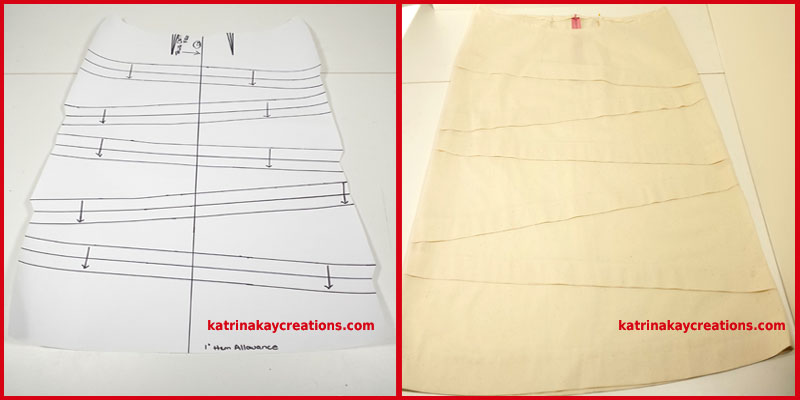
In Part 2, I’ll show you how I sewed the skirt and what the finished skirt looks like. So stay tuned!
**Update: Part 2 is not up yet because I had to put this project in time out. The pleats were fine but the fit of the skirt was not right. I haven’t given up, just had to walk away.
Can’t wait til it’s out in the world! Love that pattern making.
Thanks for reading and watching Frenie.
Katrina
The video for the pleated skirt pattern is just amazing! I am trying to increase my pattern making skills so I am definitely going to make this skirt. You are very talented.
Thank you, Rebecca. Good luck with your skirt and pattern making. I would love to know how it turns out.
I have just found your blog tonight through Pinterest. After sewing for 30 odd years I even learnt a couple of new things straight away! I love this pattern and will probably try to make a back matching piece. Thank you for your wonderful and clear directions.
You’re welcome, Pauline! After my challenges with the front, I decided not to do the back. I would love to see how your skirt turns out.
Hi Katrina,
I think you’re blog and what you share online is exceptional.
I’ve watched all of your videos and I’m a member of your Facebook group.
I really like the style of pleated skirts and I’ve wondered what would be an easy way to draft them. Thanks so much for this simple and clear tutorial.
Awww, thanks Vanessa, such encouraging words. You’re very welcome.
Love this. Going to make one this weekend.
Great Linda. Let me know how it turns out.
What a clear explanation for an intriguing skirt pattern.
Thank you, Elizabeth. I was hoping it was easy to understand.