What is a flounce?
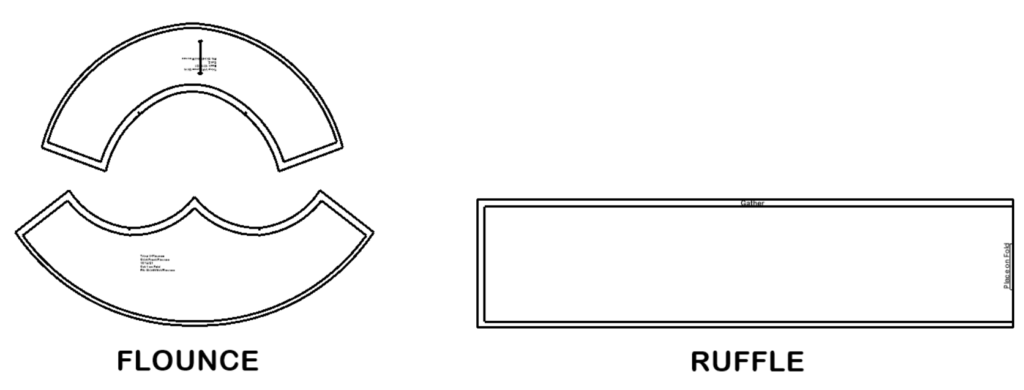
A flounce is similar to a ruffle, but different.
The similarity? They both add fullnes to a pattern piece.
How is a flounce different from a ruffle? It’s different in 3 ways:
- A flounce is made by the cut & spread method of patternmaking. A ruffle is a straight piece that has been made longer than the seam it’s being attached to.
- A flounce is attached with no gathering required because its seam is the same length as the seam it’s being attached to. A ruffle must be gathered to fit the seam it’s being attached to.
- A flounce is a circular pattern piece, not a straight pattern piece like a ruffle.
In the video below, I show you how to make a flounce for a basic skirt pattern.
Keep in mind that a flounce can be added to all kinds of garments.
Seam Allowances, or Nah?
I prefer to make patterns without seam allowances and add them at the end.
Why?
Because you should always work with the stitching line and change the seam allowance to match the stitching line. With seam allowances already included, it’s sometimes hard to remember that during the patternmaking process.
And depending on the design, seam allowances can sometimes make things more complicated than they need to be.
The pattern I’m using in this post has no seam allowances. They’ll be added when everything is done.
So, let’s make a flounce pattern.
*** Note: The pattern used in the video is half-scale, not full sized. ***
Step 1: Create The Flounce – Why It’s Okay to Guess Where Your Flounce Should Start
Where do you want the flounce to be?
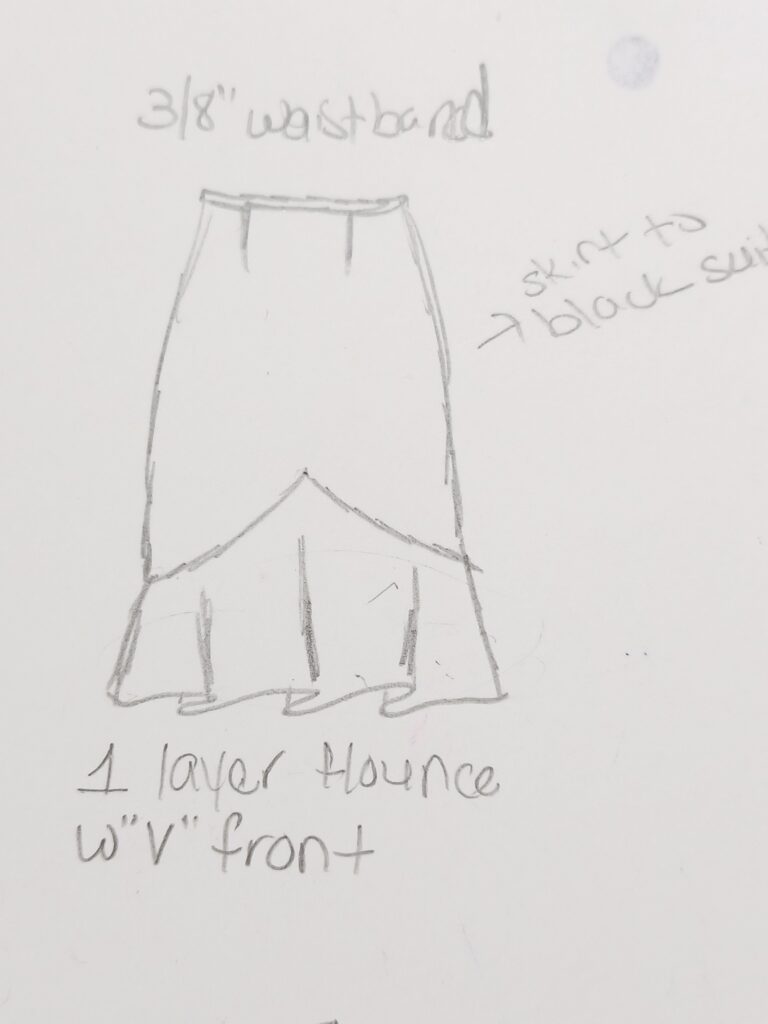
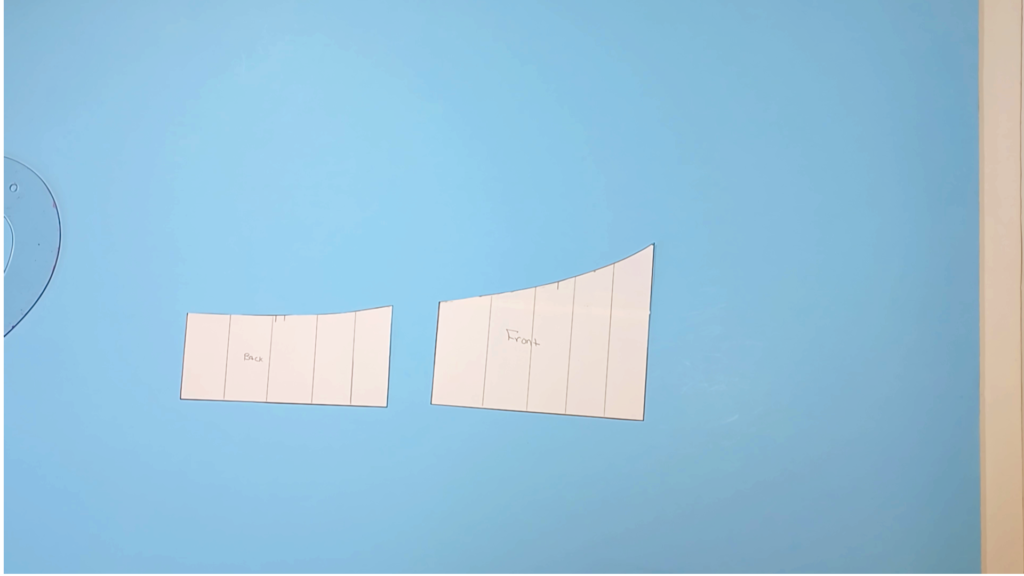
I’ve chosen to add a flounce to the bottom of my skirt pattern and it goes into a point at the center front.
So, I roughly draw in my lines.
I’m just guessing – there’s no right or wrong here.
It’s okay to guess because I’m going to test it in muslin. I need to see the finished skirt on my body to determine if I like the flounce placement. My muslin, or test garment, will let me know if my guess is a good one.
If I don’t like it, I can fix it before I cut my good fabric.
Once I’m satisfied, I’ll use my ruler (for straight lines) and French curve (for curved lines) to go over my lines.

Step 2: Separate The Flounce Pieces – The One Thing You Should Always Do Before Separating Them
The one thing you should do before cutting your flounce pieces away from the upper part of the skirt is to draw in your notches.
This is a time saving rule of thumb that you’ll always appreciate.
Which is why I don’t know why I always forget to do this step (as you’ll see in the video).
Draw those notch lines so they extend on both the upper skirt and the flounce. Then you won’t have to do any notch matching late.

Once you have your notches drawn, it’s time to separate your flounce pieces from the original pieces.
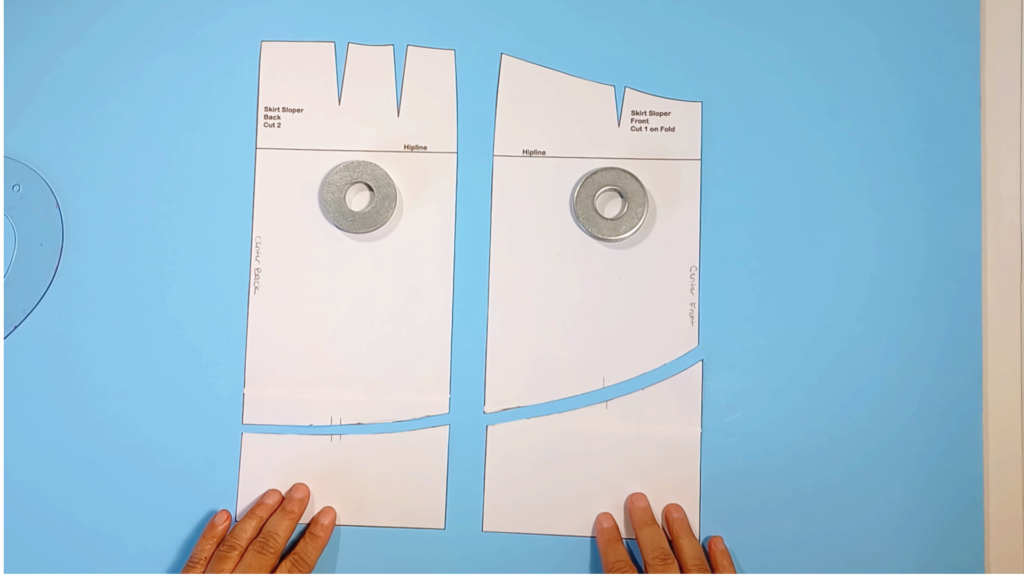
When they’re separated, draw vertical lines from the top (where the notches are) to the hem. Space the vertical lines apart a fairly even amount from center front/center back to side seams. (See below)
Because I’m using a half-scale pattern, mine are approximately 1” apart. But for a full-scale pattern, they can be much further apart.
Step 3: Add Fullness To The Flounce Pieces – Careful, Careful, With The Cut & Spread
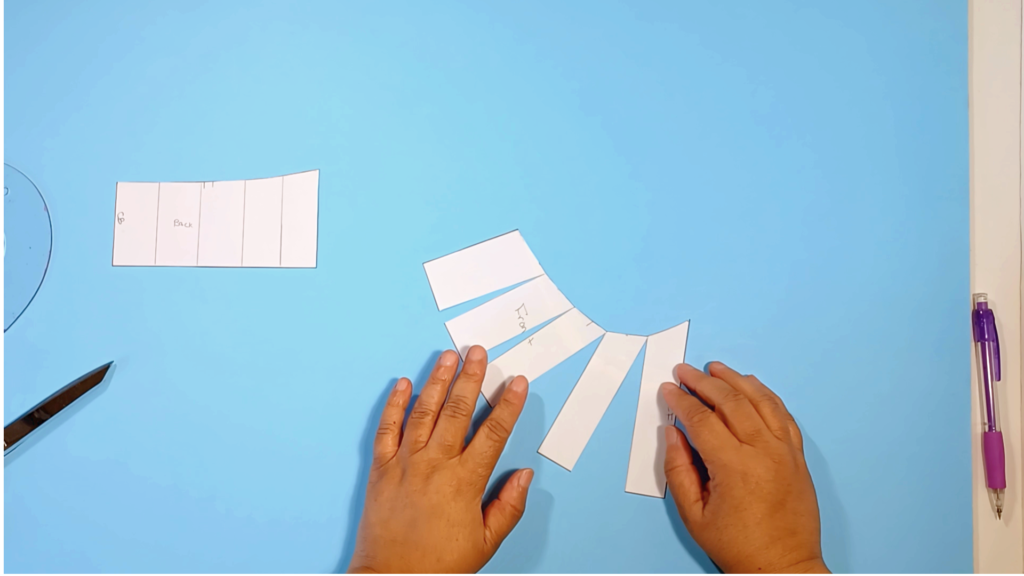
It’s time to grab your scissors.
Starting at the hem of the flounce pieces, (hint: the top of the flounce has notches, the hem does not) cut to, but not through, the top of the flounce. I try to stop about 1/8” from the edge.
You do not want your flounce piece to come apart at the top. It’s not fatal to your pattern, just not as easy to work with.
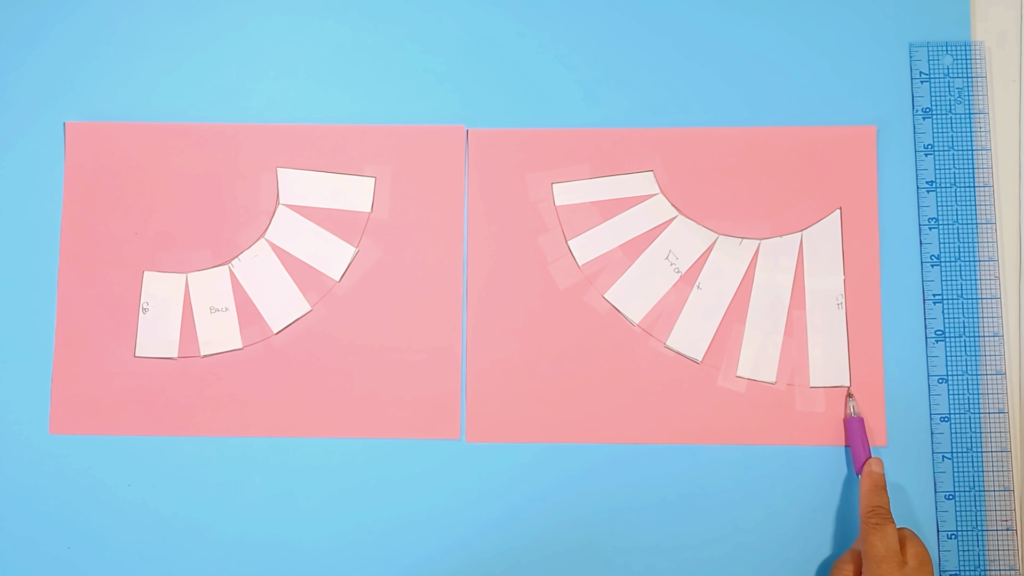
Spread your flounce pieces to your desired fullness. The amount of fullness is totally up to you.
Use paper to fill in the gaps created by spreading.
But you’re not done yet.
Once your paper is taped in place, fix the top edge of the flounce. Use your French curve to create smooth lines at the top of the flounce where points were created by spreading the piece.
Also, use your French curve to draw in the hem of the flounce, making sure the hemline is smooth with no pointed edges as well.
Step 4: Add The Finishing Touches – The 2 Things I Want To Skip, But Can’t
The first thing I want to skip at the end, no matter what kind of pattern I’m making, is trueing the seams.
It’s not that it’s hard, I just don’t want to take the time to do it.
But if I do it now, it won’t cause me problems when sewing later.
The second thing I want to skip at the end is adding seam allowances. I don’t know why this seems like such a chore.
But not liking to add seam allowances at the end is not enough to make me draft my patterns with seam allowance included because I dislike that even more. So, I do what I have to do.
I suggest trueing your seams first, then adding your seam allowances.
You true your seams by:
- Butting your front and back flounce pieces together at the side seam and making sure the top lines and hem lines remain smooth.
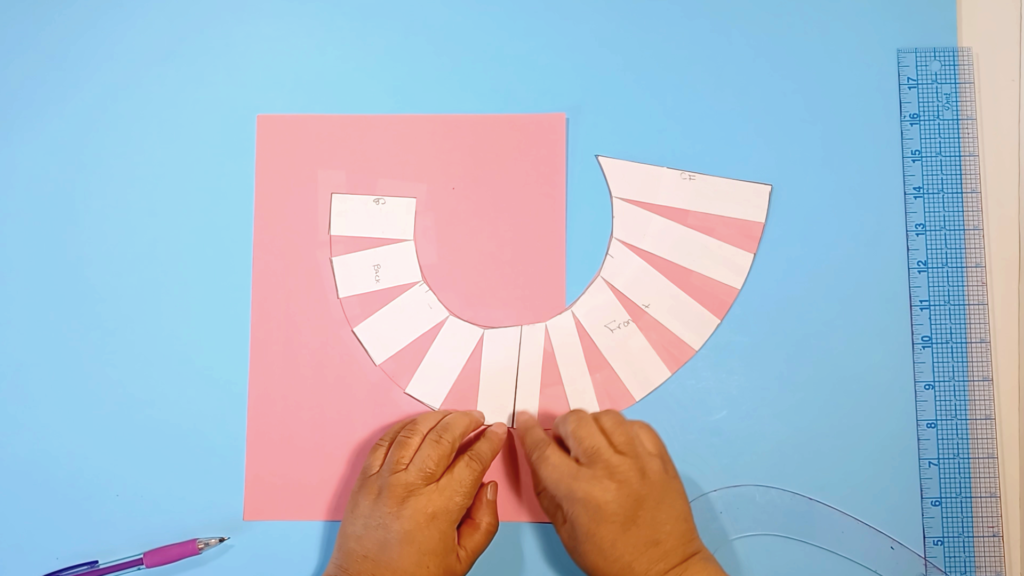
- Butting your front and back, upper skirt pieces together at the side seam and making sure the lines remain smooth
- Using your French curve to smooth out any lines that have sharp edges or come to a point.
If you aren’t working with seam allowances, add them and draw in your notches on all your pattern pieces.
If you are working with seam allowances, fix any that need fixing.
And don’t forget to test your pattern to make sure it fits and looks like you want it to.

Have you ever made a flounce pattern? Let me know in the comments.
Give It A Try
Have you always wanted to try your hand at patternmaking, but didn’t know where to start?
Adding a flounce to your skirt pattern is a great place to start.
It’s simple and won’t take a long time to do.
Just like sewing, the more you practice patternmaking, the better you’ll get at it.
And remember, you can add flounces to other kinds of garments as well.
So, get your creative juices flowing and make flounce patterns galore!
Or just one. That’s okay, too.
Thank you!! Trying to get the courage up to make my own patterns/designs. You are a great teacher!
Thank you so much, Deborah. You can do it, I promise. Start with basic patterns/designs and build from there. You got this!
Thanks so much!!!!
You’re welcome, Beth. Thanks for reading/watching.
I was looking for a way to add a flounce to a top. Thank you
Oh great! You’re welcome, Frankie.
Katrina Kay Creations,
Have not watched the video yet, but the text is so clear! Well done, and thanks for posting. It is my contention that this is the way to teach sewing!
CS Murphy
As someone who loves to teach, this is so good to hear. Thank you for reading/watching, Catherine.
I love the way you teach!
I’m so glad to hear that, Gail. Thank you for reading/watching.