If you haven’t seen my previous post, How To Make A Flounce Pattern In 4 Simple Steps, click here. This blog post is part 2 of my series on making a skirt with a flounce.
What is a muslin and why is it called a “muslin”?
A muslin is a test garment usually made of is a cotton muslin fabric, which is why it’s called a muslin.
Why bother making a muslin?
Do you think it’s a waste of time and fabric?
The fashion industry tests every garment in muslin before it goes to the manufacturer.
And the sewing industry tests every pattern in muslin before it goes to print.
Why?
Both industries would rather catch and correct mistakes in the beginning of the process to avoid money and time loss in the end.
How valuable is your time and money to you?
If you want a sure way to save your time and your money, decide to make a muslin for the patterns whose fit you’re unsure of and read on.
Or better yet, watch the video below.
Why Sew A Muslin?
Making a muslin, or test garment, allows you to test the fit of the pattern you’re using before cutting your good fabric.
You know – that fabric you had to have as soon as you saw it because you had the perfect pattern for it, or it was on sale, or it was your favorite color…or just because.
Yeah, that fabric.
We wouldn’t want to waste it, now, would we?
Of course not! We’d rather wear it.
Well, a muslin will make sure that’s the result we get – wear, NOT waste.
This is important.
- You DO NOT have to sew a muslin with facings, interfacings, trims, hems or closures. In fact, straight pins and marking pins will be your best friends when fitting a muslin.
- You DO NOT have to make a muslin in a way that, if the fit is good, you can wear it as your good garment. This is also not the purpose of a muslin but more a personal choice. It’s okay to use a muslin solely for the purpose of fitting.
- Every garment sewing project does NOT REQUIRE a muslin. Unless you’re making major design changes, patterns you’ve used and altered already don’t need a muslin.
You do not have to sew a muslin with facings, interfacings, trims, hems or closures.”
katrinakaycreations.com
Whew! That’s out of the way. Now let’s get to it.
Step 1: Mark Your Skirt Muslin – Why This is An Important Step
What do you mark after cutting your skirt muslin?
Everything that will help you during the sewing process and the fitting process. That’s why this is an important step.
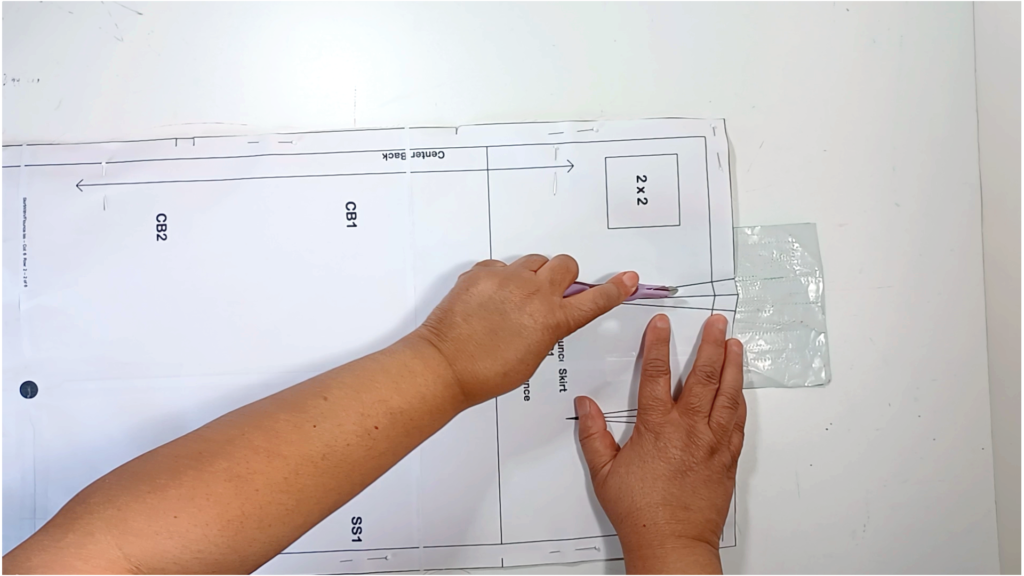
For the sewing process, (these will be marked on the wrong side of the muslin) mark:
- Darts or any design detail you need to be able to see to sew. There’s no need to do any guessing when marking will save you time and headaches in the long run.
- Stitching lines if you need them marked as a guide while sewing.
- Any markings you determine will help you avoid sewing headaches, later.
For the fitting process, (these will be marked on the right side of the muslin) mark:
- Your hip line to use as a reference while fitting. The hip line should be level as it goes around your body, so you’ll need to be able to see it while wearing the garment.
- The center front and center back if there is no seam. If there is a seam, mark with a marking pin or marker so you can easily see them during fitting. They’re also reference lines and should hang straight, not pull to the side.
- The stitching line of the opening that will allow you to get into the skirt, where a zipper would normally go. You’ll have to pin this closed during fitting. These marked lines will let you know exactly where to pin.
- Placement details for pockets, etc. to get an idea of the location on your body while wearing the garment.
Step 2: Pin Your Skirt Muslin – Why It’s Not a Sin To Use Pins (Or Clips) When You Sew
I don’t know what people have against using straight pins.
But know this, you are not an amateur if you use pins or clips to hold your seams together. I promise.
You’re also not going to hell. Pinning is not a sewing sin. So, pin/clip to your heart’s content. 😂
I use lots of pins. I’d rather use pins/clips than mess up the seam and have to spend 20 minutes looking for my seam ripper.
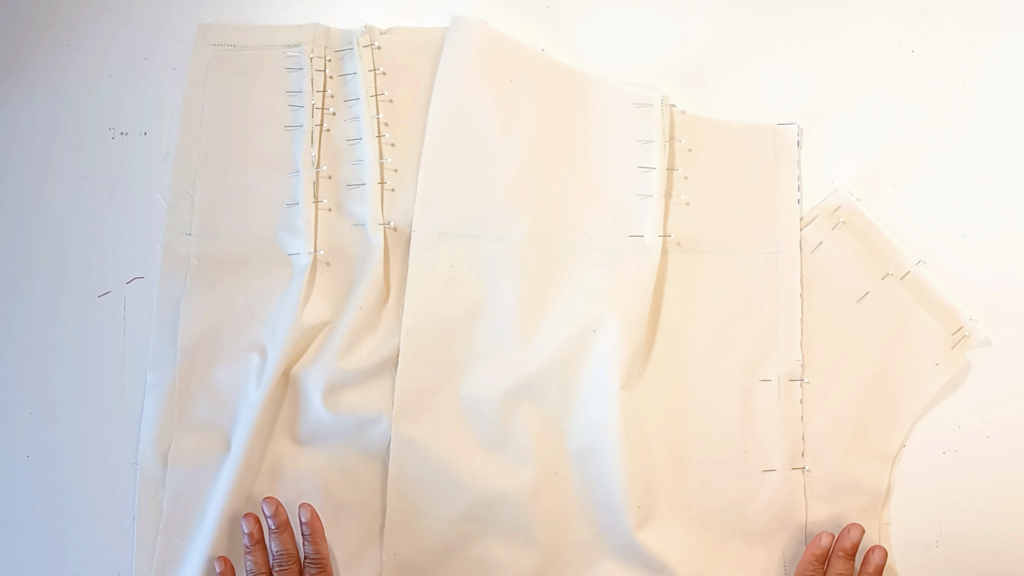
Before I sew, I pin everything I’m going to sew in the first round.
When you pin, use pins or clips, whatever you prefer. I like both.
Except for darts, I prefer pins.
I mainly use pins right now because I can’t find my clips. I think I put them in a place where family members wouldn’t “borrow” them and hid them so good, I don’t even know where they are. But I digress.
What do I mean by first round?
I mean sewing all the seams and design details that ARE NOT attached to another seam or another part of the garment.
In other words, these are stand-alone seams and details like darts, center front and back seams, side seams, etc.
Pressing as you sew, and yes this is necessary for muslins also, DOES NOT mean I have to sew one seam then press that seam immediately.
I can sew several stand-alone seams, then press them all at once. This is why I pin them all at once.
As I’m sewing, I go from one seam to the next until everything is sewn.
That’s what I do in my first round of sewing.
Then I take it all to the ironing board and press. Trust me, this saves so much time, which is good because you want muslin sewing to be as efficient as possible. It does not need to take long.
So, for this particular skirt muslin I’m sewing in the video above, the first round of sewing included:
- Darts
- Center front seam with opening
- Center back seam
- Flounce side seams
I could have sewn the skirt seams but I prefer to press everything without the side seams being joined, first. But it could be done either way.
It’s time to sew now that everything is pinned.
Step 3: Sew Your Skirt Muslin – Here’s a Time Saving Sewing Tip
Now it’s time to sew everything I’ve just pinned.
You can sew in any order because these are all stand-alone seams or details. This is why we pin them first so there is no pin-sew-pin-sew situation.
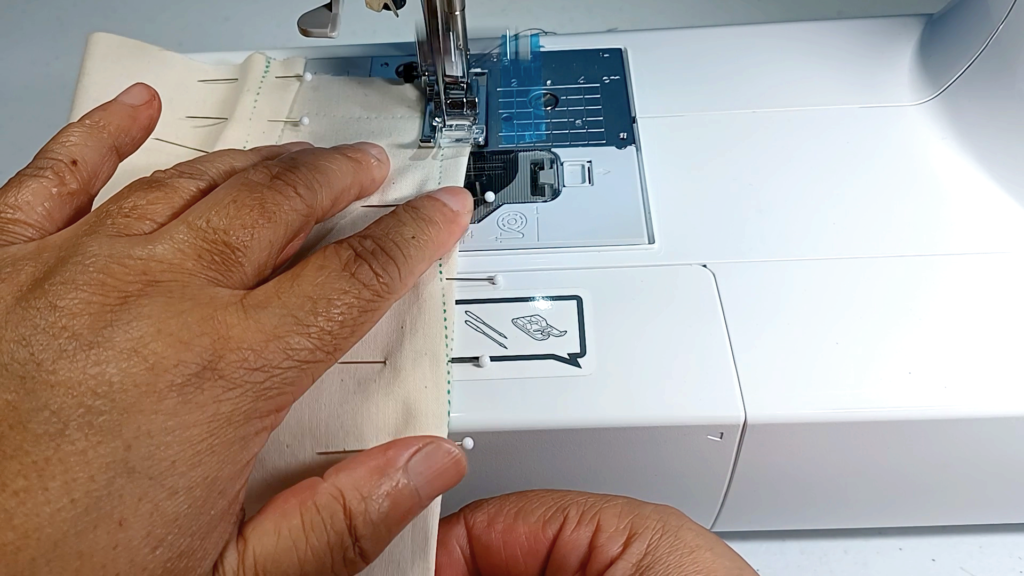
However, I sometimes sew darts first. This is only because I don’t want to take a chance of any of my pins coming out in the dart area as I’m handling the pieces.
And here’s a time saving tip for sewing the seams…don’t cut the threads at the beginning and end of each seam, yet.
Just keep sewing. I’ll go back and cut all the threads when all seams are sewn together .
You can cut the threads after sewing each dart just because it might make it easier to sew the next dart.
But the seams you can sew back-to-back without cutting the threads, backstitching at the beginning and end of the seams like you normally would.
This speeds up the sewing process and saves some time.
Step 4: Press Your Skirt Muslin – Why Batching Works For This & Steps 1-3
What is batching?
Batching is a productivity strategy that involves grouping similar tasks together to complete all at once.
Did you notice what I did in Steps 1-3? I grouped similar tasks together (i.e., all the marking, then all the pinning, then all the sewing) to complete all at once. I do this on projects with my good fabric also. It saves so much time.
And now we’re ready to do all the pressing for all the pieces we’ve just sewn together.
Pressing while sewing a muslin is just as important as pressing while sewing your good fabric.
Pressing is very important if you want to do an accurate fitting assessment.
I go to the next parts of the skirt that can be sewn together now that the first round of sewing and pressing are done.
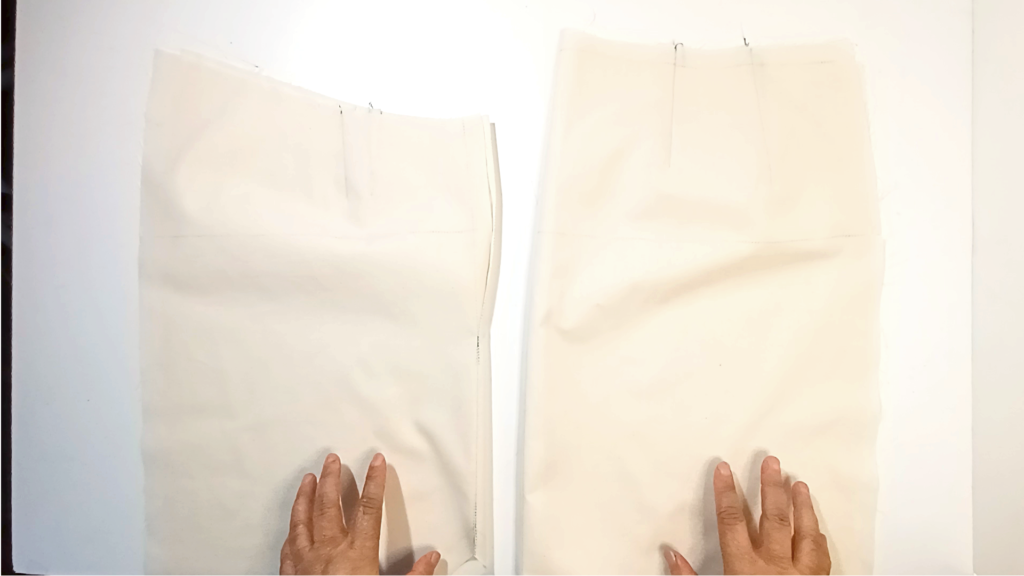
For my skirt muslin, since I didn’t sew my side seams in the first round, I’ll pin, sew, and press them, also.
I like pressing everything before I sew my side seams together. Otherwise, I could’ve sewn them in the first round.
Step 5: The Finishing Touches – Details, Details
This is where you attach any additional details to your skirt.
In this case, the flounce is the additional detail I’ll sew to my skirt.
I’ll then press the flounce and this muslin will be complete and ready for me to try on.
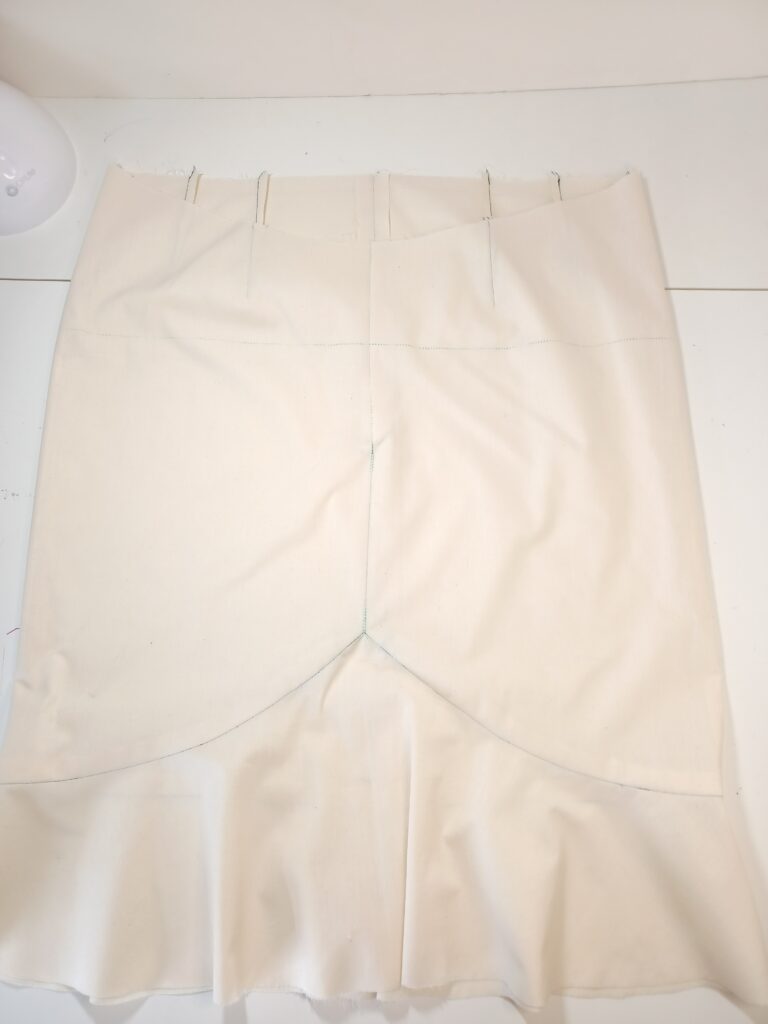
The Result
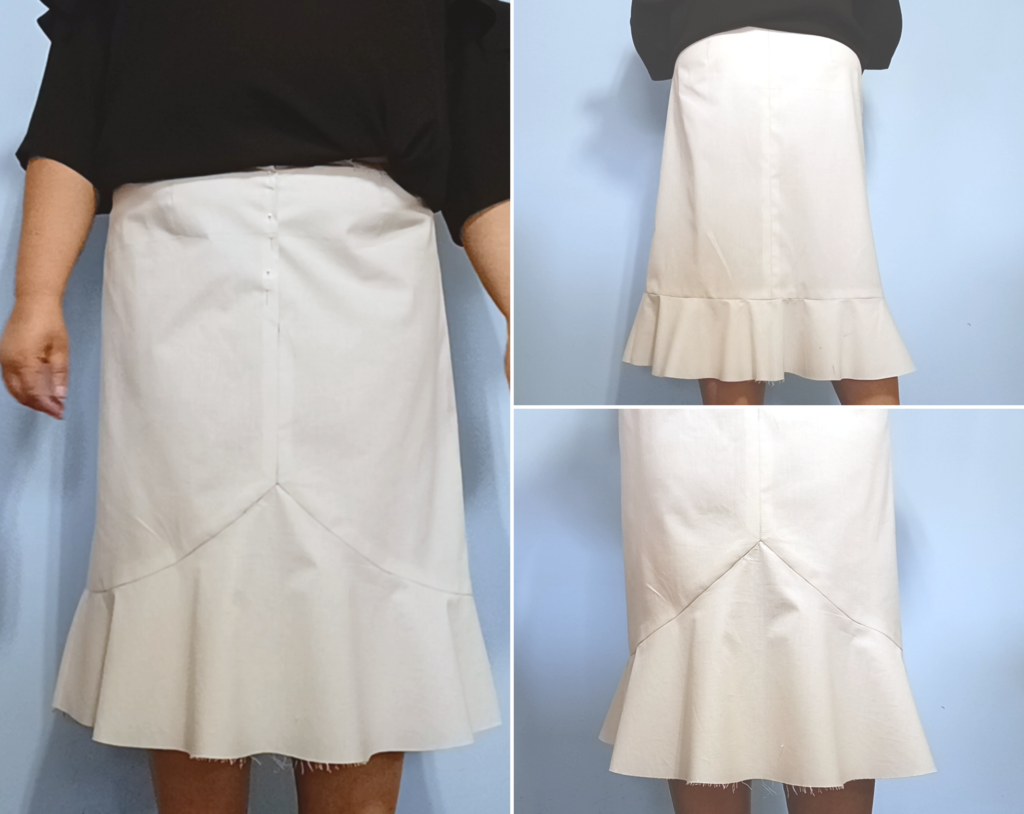
My marking for the hip line is very light and doesn’t show up in the pictures, but it was level around my body. Next time I’ll draw in a darker line.
My waistline didn’t have any markings at all. Maybe I had the tracing paper the wrong way? I don’t know, but I definitely thought I marked it.
l’ll being doing minor alterations, like taking in the waist and side seams a little. I’m also going to try taking in the center back to see if the hip area will fit better. I’ll do these alterations right on the muslin and try it on again.
I’m happy with the placement and fullness of the flounce, so no changes will have to be made there.
Give It A Try
Have you ever wasted your good fabric because the pattern didn’t fit?
Do you have a brand, spanking new pattern you want to try?
And are you an “avoid-sewing-a-muslin-at-all-costs” type of person?
Using the tips I’ve given you in this blog post, give muslin making a try. Test your pattern before you cut your good fabric.
You have nothing to lose, even if your pattern doesn’t need any changes.
If you sew a skirt muslin, let me know how it works out for you.
Your good fabric, your time and your wallet will thank you.
Enjoyed this lesson. Easy steps to follow. Especially like the added flounce. Can’t wait for more teaching from you.
I can’t wait to teach more, Robin. I’m so glad the steps were easy to follow and that you enjoyed the lesson.
That was a brilliant class! Katrina, you are a natural. I’m a beginner at dressmaking and have been searching the net for a lesson on making a Muslim and yours is the first one that I haven’t become bored with halfway through. You keep it relevant. And lots of little tips on how to be quick ie batching the jobs, like pressing or cutting threads. These little tips go a long way. Thanks for that.
Bernadette (from Ireland)
I’m so happy you didn’t get bored, Bernadette. I try to get straight to the point. Your feedback is appreciated. And I’m so glad the tips were a help to you.
Excellent lesson. I am trying to get up the courage to do garment sewing again, a skirt, and thought I would do a muslin mock-up first so this came in my email at the perfect time. I think I can do it. First the skirt, then a dress pattern I put aside.
Thank you!!!
You can definitely do it, Eileen. I wish you all the success on your sewing projects.