This post is part 3 of my series on making a skirt with a flounce. If you’d like to read the previous posts in this series go to How To Make A Flounce Pattern in 4 Simple Steps and How To Sew A Skirt Muslin: Step-By-Step Guide.
What are darts?
Darts are folds sewn into fabric to give shape to a garment for a closer fit around the contours of the body.
Is there only one correct way to sew a dart?
Absolutely not.
Which is the case for most sewing techniques.
But I learned this method years ago.
It works.
Which is why I keep using it.
And I want to share it with you.
In the video below, I show you how to sew a dart in 4 easy steps.
So, let’s get started.
Step 1: Mark Your Dart – The One Thing You Should Mark That Most Pattern Companies Never Include
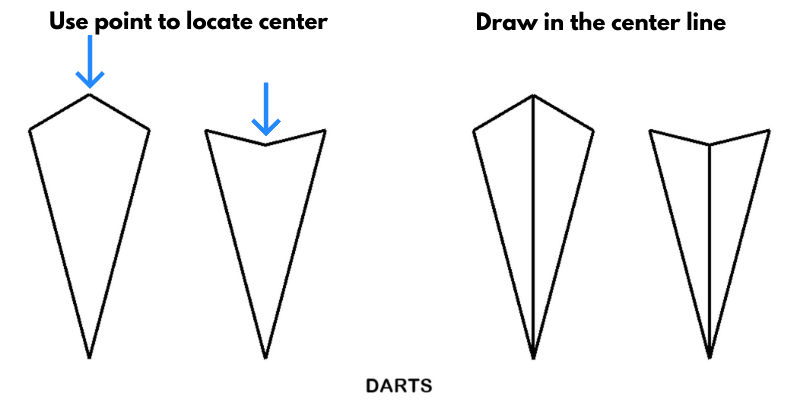
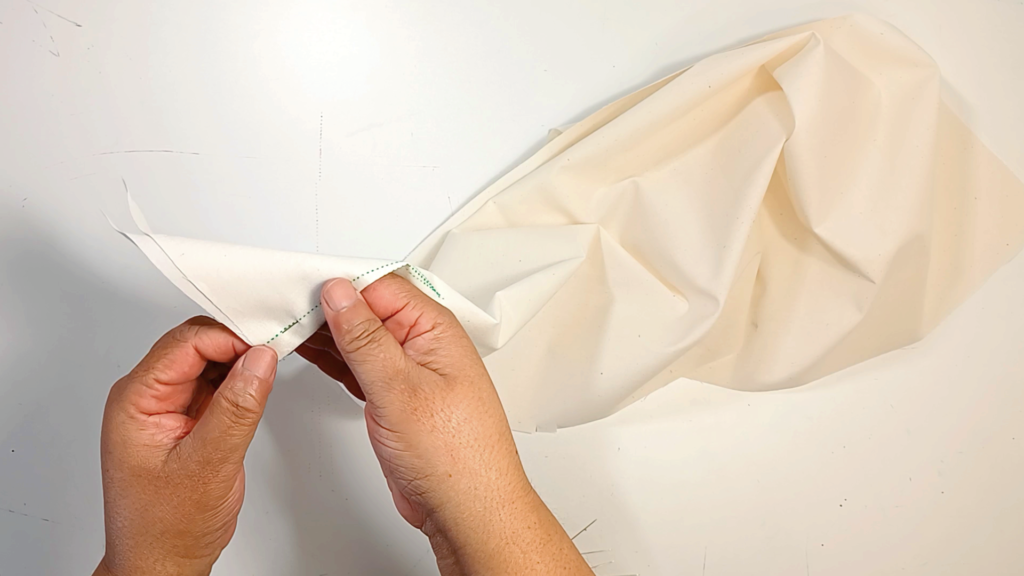
The one thing that is very helpful for me during the dart pinning process, that I rarely see on commercial patterns, is a center line inside the dart.
But luckily, adding a center line to your dart is a very easy thing to do.
You can draw a line from the raised or indented point at the top center of the dart to the dart end. Or you can fold the dart in half and follow the crease.
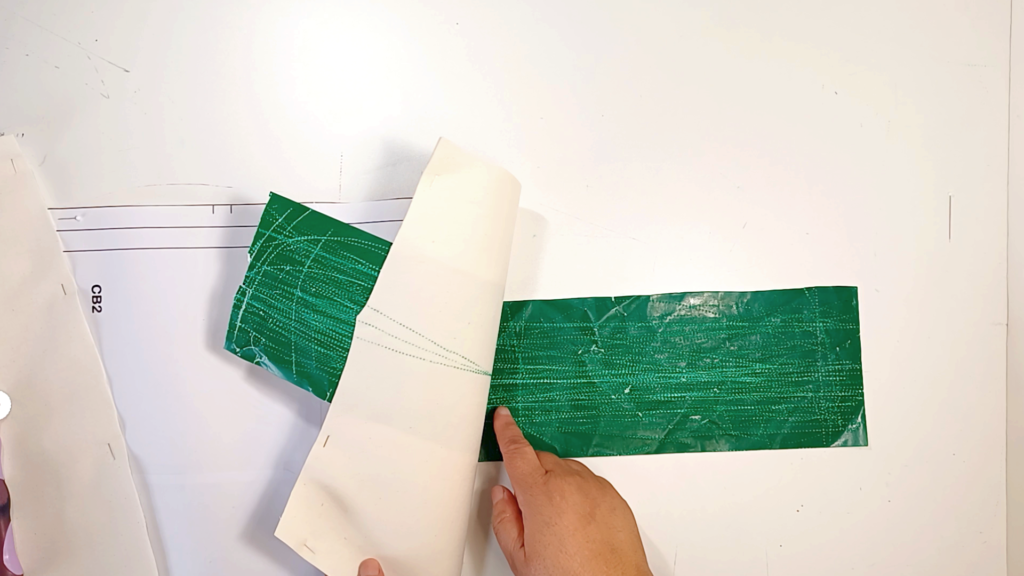
When marking a dart, I like using good old-fashioned tracing paper and tracing wheel.
But don’t use the chalky tracing paper. It’s way too messy.
In the video above, I show you how I mark my darts.
What do I mark?
- Both legs of the dart
- The center line of the dart. You’ll see how I use this in Step 2.
Step 2: Pin Your Dart – How to Pin Your Dart For An Almost Perfect Result
Ok, this is where I might lose a lot of people because I go overkill on pinning my darts.
I do this because I like the result I get.
When I sew my dart, I want the stitching to be on my marked line on the upper side (which I can see while sewing) and the underside (which I can’t see while sewing).
The best way I know to do this is to pin the dart in the right position in the first place.
To see how I do this, watch the video above.
So, the first thing I do is pin on the dart leg so I can see if it’s matching on the underside.
Where does the center line come in?
The center line shows me where to fold the dart from the top of dart to the dart end.
If I place a pin on the dart leg on the upper side and the pin is off the line on the underside, the center line is there as a guide as I make adjustments.
Why do I bother with all this?
Long answer: because I’ve sewn darts and the stitching was way off on the underside. This can affect the position of my dart. I definitely don’t want to do a needless alteration because my sewing is off.
Short answer: because I’m a perfectionist and I need help. Y’all pray for me.
Once the pins are on the marked lines on both the upper and underside, I then pin across the marked lines because the previous pins can’t go in to my sewing machine that way.
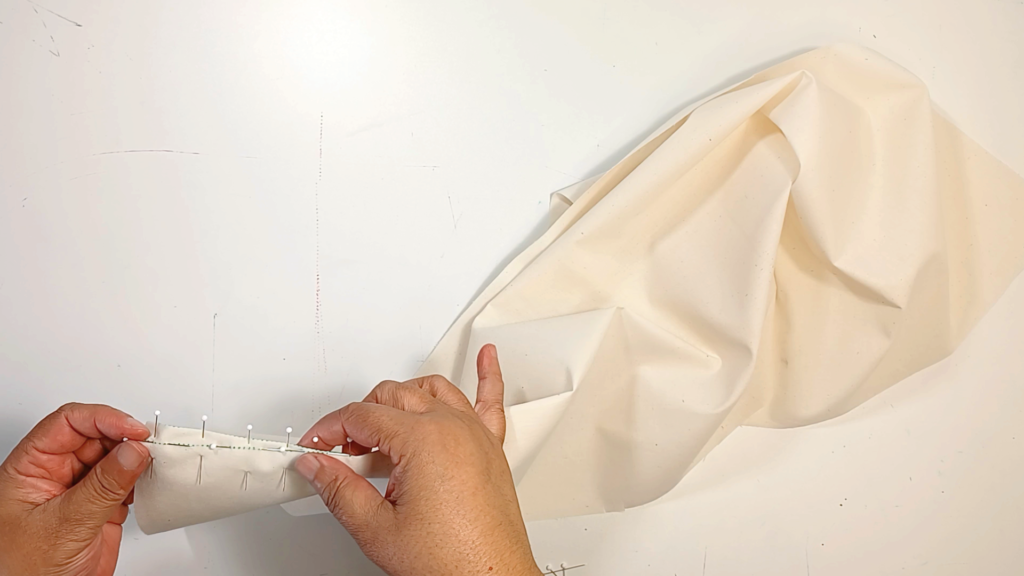
And yes, I can put the pins the other way so I can pull them out as I sew, but for me as a lefthander, that’s awkward. It really would take me longer to do it that way, so I do this extra step instead. But you certainly don’t have to.
Once the cross pins are in, I remove the others.
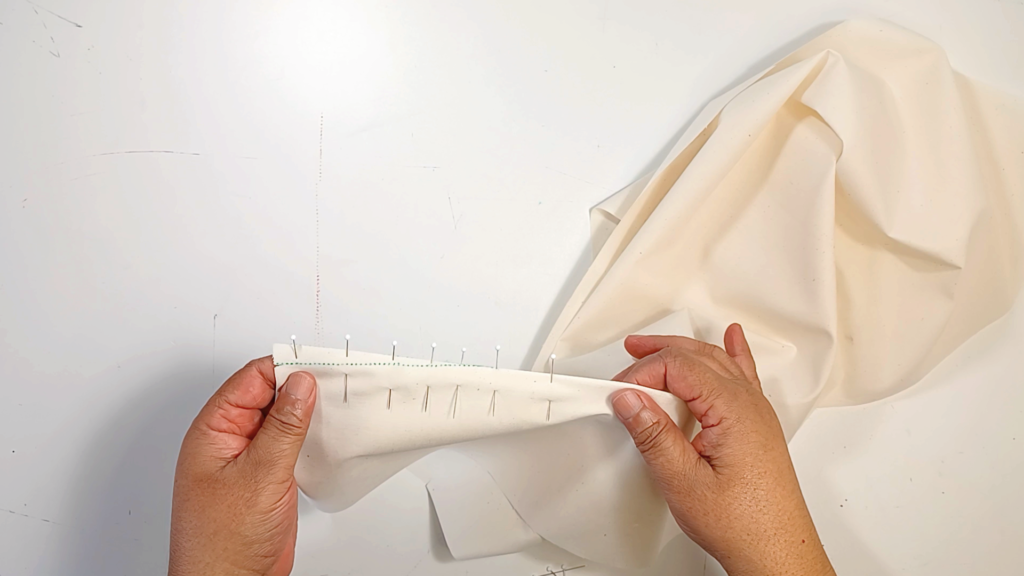
I do this pinning process for every dart.
It takes some time but because I like the result so much, I do it anyway.
This is a great thing to do while watching TV, especially if I’m not going to sew them until the next day.
Then I’m ready to sew.
I’m a perfectionist and I need help. Y’all pray for me.”
katrinakaycreations.com
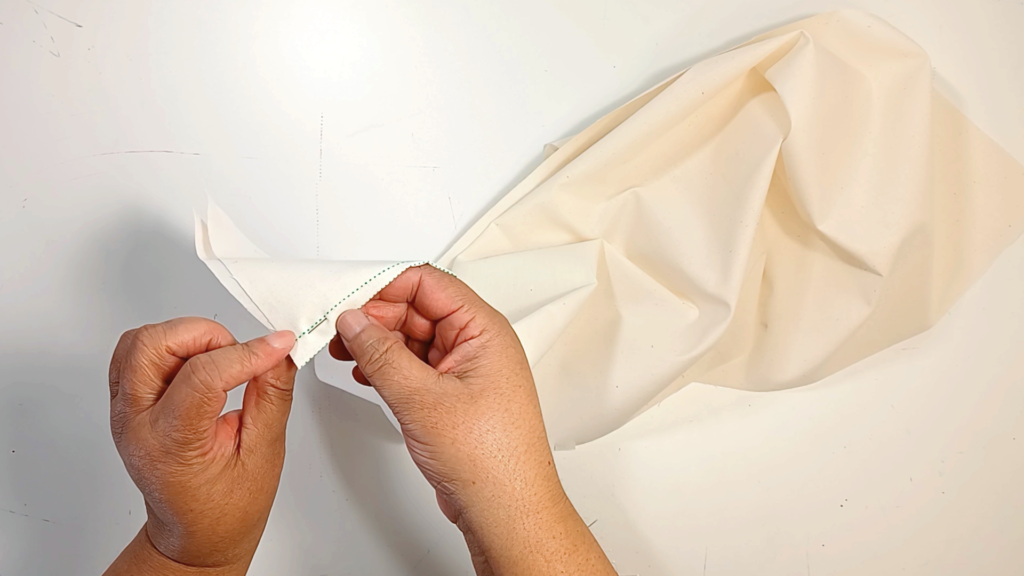
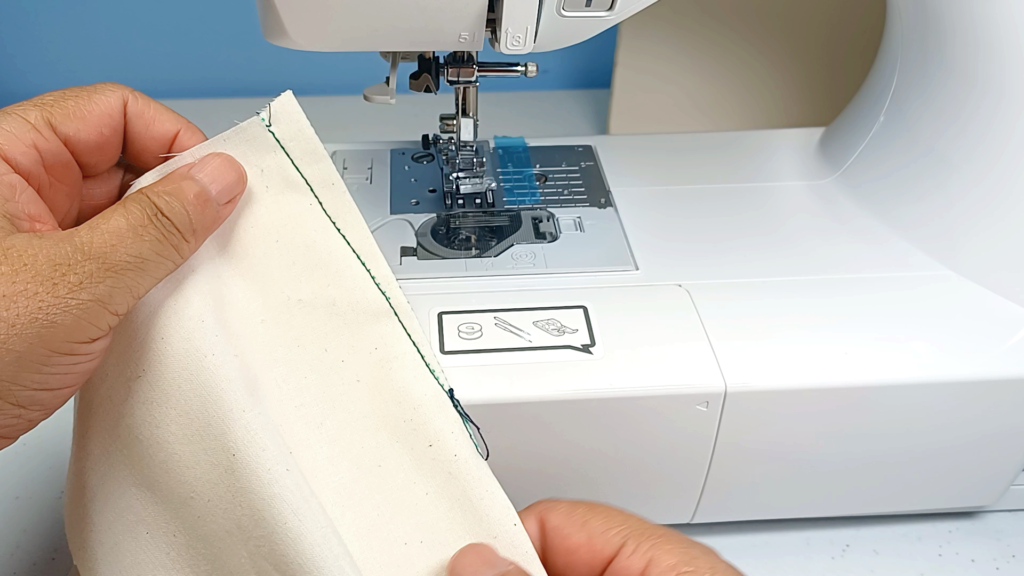
Step 3: Sew Your Dart – What to Do at the End of Your Dart Instead of Backstitching
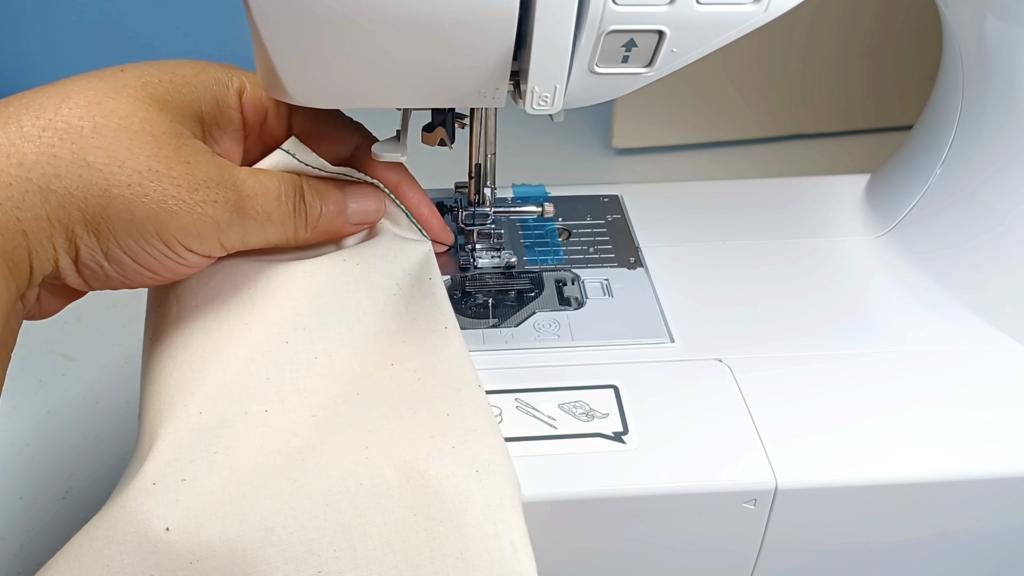
The pinning process makes sewing the dart easy.
I remove the pins as I sew, holding everything in place with my finger so nothing moves after I take the pins out.
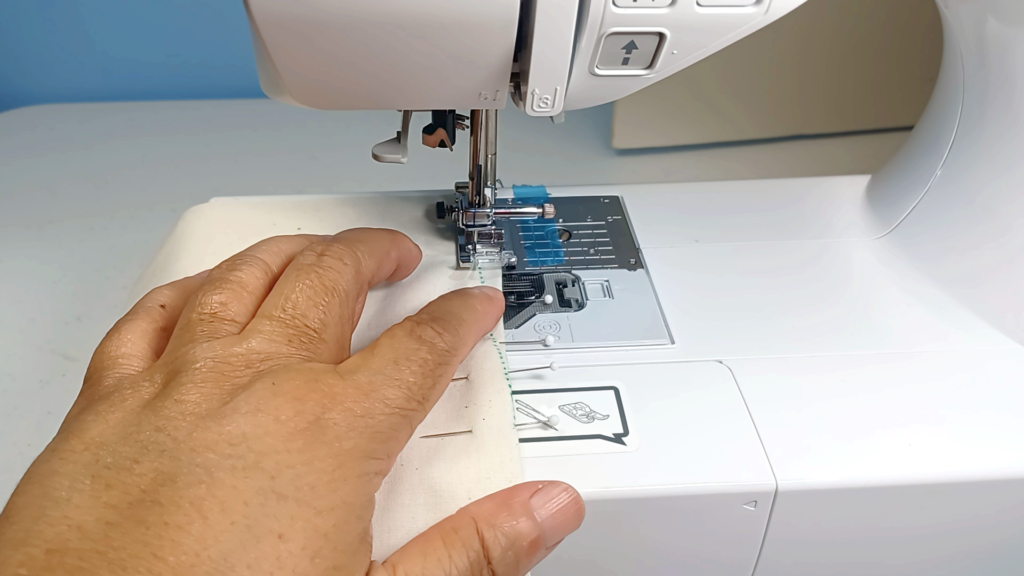
Of course, when you start sewing you should backstitch to lock your stitch.
But when you get to the end of your dart, you’re NOT going to backstitch.
Instead, right before you get to the end of the dart (about 1/4” away) stop sewing. It doesn’t have to be 1/4” exactly, just somewhere around there.
Then put your stitch length on the lowest stitch length on your machine. For me, that is 1.0.
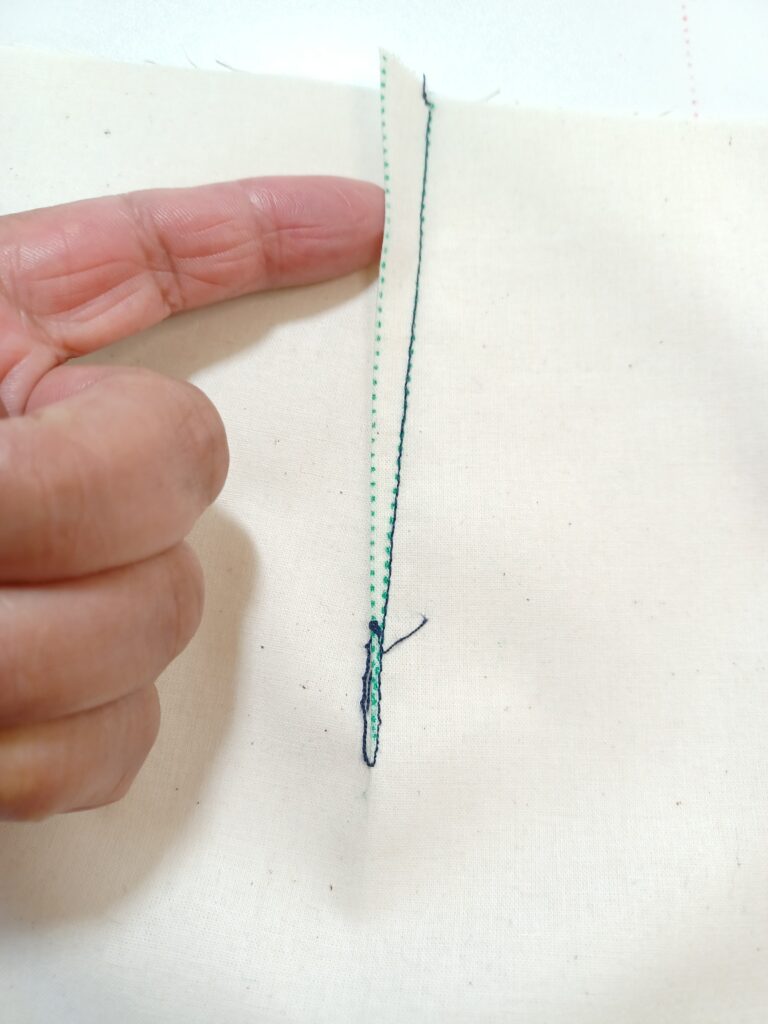
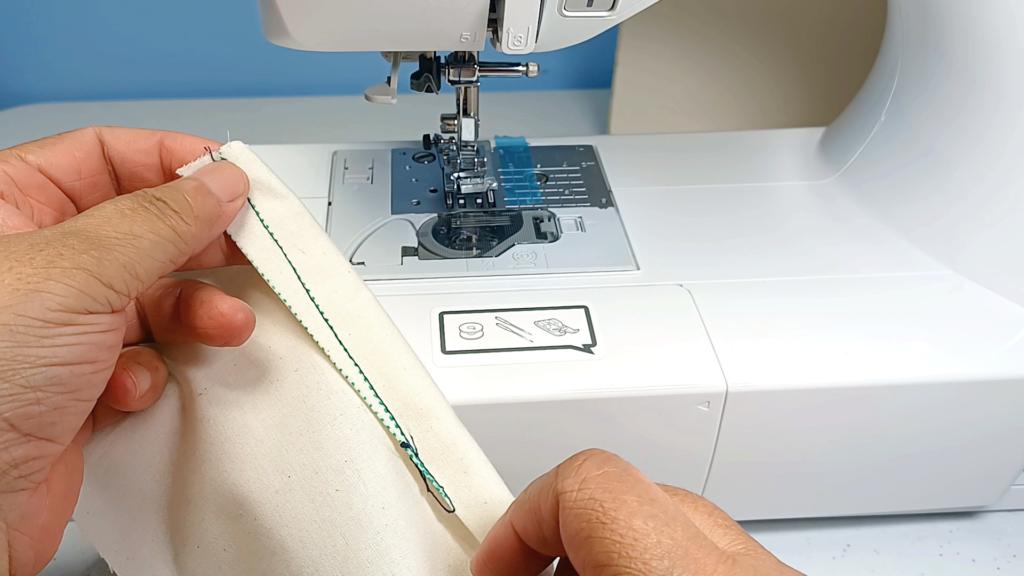
Then continue to sew to the end of the dart and off the edge of the dart. This is what we’re going to do instead of backstitching.
But we’re not finished yet.
Keep sewing until you have a thread chain approximately 1/5” to 1.5” long. It doesn’t need to be longer than that.
To see this in action, watch the video above.
Then, lift your presser foot and gently pull your dart forward. Make sure the thread chain is not too taut. There should be a little bit of give so it does not pull on your dart.
Change your machine back to your regular stitch length. For me that setting is 2.5.
Now sew within the inside part of your dart (the part that will not show on the right side) a couple of stitches and backstitch as you normally would.
Why sew a dart this way?
It will prevent puckers at the end of your dart and lay nicely on the body.
I personally think the best darts are the ones you barely know are there.

Step 4: Press Your Dart – The Best Tool For Pressing Darts
The best tool to use for pressing your darts is the pressing ham.
Because darts give shape to fabric around the curvy areas of the body, they’re pressed on the pressing ham (which acts as a curved mold) instead of flat on the ironing board.
I usually press the inside fold of darts toward the center front or center back. This is a personal choice, not written in stone.
Give Sewing a Dart A Try
Have you ever been dissatisfied with the way your darts turn out?
The beauty of sewing is that the more we sew, the better we get at it.
And learning new techniques is a way to build up your sewing skills.
So, I hope you will try sewing your darts this way, if you haven’t already, and see whether you like the result.
And use the video above as your sew-along. That’s what it’s there for.
What best describes how you feel about sewing darts?
Let me know in the comments if you are a:
- “I can sew darts in my sleep” type of sew-er?
- “I avoid them as much as possible” type of sew-er?
- “It really doesn’t matter, I sew whatever the style requires” type of sew-er?
Great easy to follow video. Would you please do a video on sewing French Darts. Also what brand tracing paper do you use? So many I have tried do not show up on my fabric. I like the old fashioned type but do not know where or what to purchase anymore. Thank you for your help.
I bought my tracing paper on Amazon years ago & it does the job, but it’s not as good as the old fashioned type (which I like better too).
I sew French darts the same way I did in this video.
I learned how to sew in Home Ec in 1974. Thanks for this new and improved technique on sewing darts!! We were taught to tie a knot at the end of the darts!!
That’s how we were taught too, Deborah. I tied knots at the end of my darts for many years.
I am a novice sewer. So, I guess I am a “It really doesn’t matter, I sew whatever the style requires” type of sewer?
I really liked your tutorial. It was very clear, easy to follow and gave me lots of tips. Thank-you and well done.
Thank you so much, Pamela.
Thank you so much for your instruction on darts! Especially the tip on what to do instead of backstitching.
You’re welcome, Carolyn. Thanks for reading/watching.
Thank you for this very instructive article.
You’re welcome, HFL. Thank you for reading/watching.
I like how you finish off the stitching at the point of the dart. Thanks for the helpful tutorial.
You’re welcome, Connie. Thank you for reading/watching.