Discloser: Some of the links below are affiliate links, meaning, at no cost to you, I will earn a commission if you click through and make a purchase. Affiliate links are marked with an asterisk (*).
When I was a teenager watching my mother sew, it looked so easy. Sewing always looks easy when someone else does it. But as soon as you lower the presser foot and try to sew a straight line, you realize sewing is not as easy as it looks. The good news is, there are seam guides out there to help beginners sew straight seams. Today, I want to talk about 4 seam guides that will help you sew seams right.
Keep in mind, none of us automatically know how to sew a straight seam or curved seam. It takes practice, practice, practice. And even then, close to perfect is probably the best we can all do.
Why is it so important to sew your seams right? And how can a seam be sewn wrong?
A crooked seam is a seam sewn wrong. Also, a seam that is smaller or larger than the seam allowance built into your sewing pattern is a seam sewn wrong.
Crooked seams will affect the look of your garment. They will scream to the world your garment is homemade. Also, pressing a not-so-straight seam can cause ripples and may not allow you to press it flat.
Crooked seams and seams sewn larger or smaller than the pattern’s seam allowance can affect the fit of your garment. If you stitch only 1/8” past your stitching line, that doesn’t seem like much. But seams are created when the front and back of a garment are sewn together, so multiply 1/8” by 4 and you’ve now taken ½” total out of the width of your garment. And vice-versa, you could add an unneeded ½’ to your garment. In other words, it all adds up.
Of course, depending on the design of your garment, ½” may not be a big deal but in other cases it may be.
I once worked with another sewer to create baptismal robes. We used a very simple pattern with a jewel neckline. The other sewer was able to cut and sew the robes and sew on facings, but couldn’t finish the neckline or hems because of other commitments.
The robes had to be done by a certain date, so I finished what she couldn’t. When I examined the robes, I noticed she hadn’t sewn her neckline with the standard 5/8” seam allowance, but instead, they were about 1 inch.
For this robe style, it wasn’t a major problem because nothing was attached to the neckline but the facing. It decreased the width of the neck facing, but because the facing was topstitched, I didn’t have to worry about it rolling out. But if a collar had been involved, some adjustments would’ve been needed.
My point is, you want to sew accurate seams on the seam lines intended by the pattern designer. That’s what the 4 seam guides I’m getting ready to talk about will help you do.
1. Throat Plate Guide
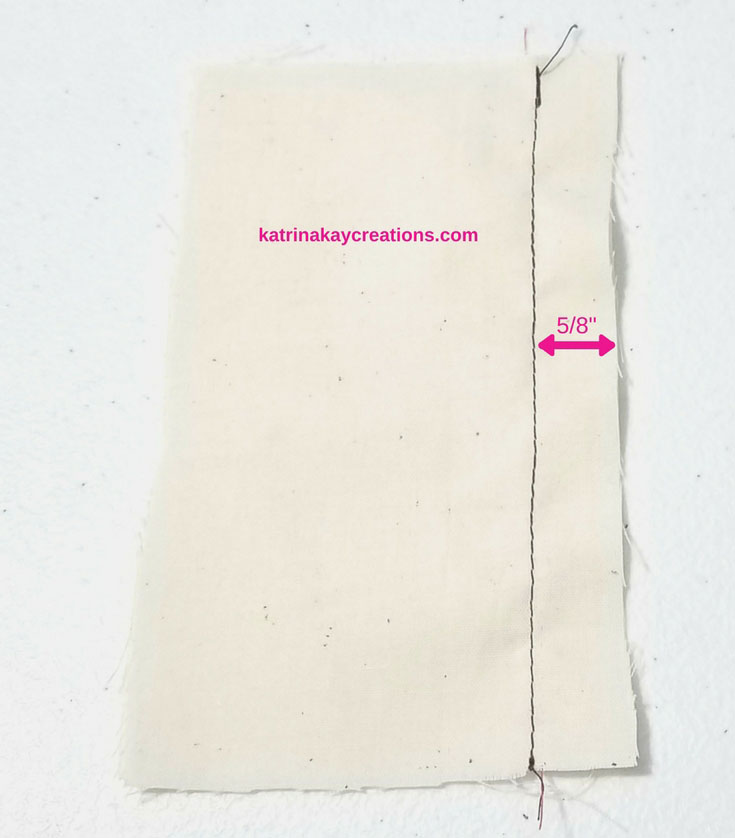
The space between the stitching line and the edge of your pattern is the seam allowance. This amount is allowed for the sewing of your seams without affecting the finished measurements of your garment.
The amount of seam allowance added to your pattern is determined by the pattern manufacturer and can vary depending on the company. The sewing industry standard is 5/8”. Any seam allowance smaller or larger than 5/8″ will be indicated on the pattern piece.
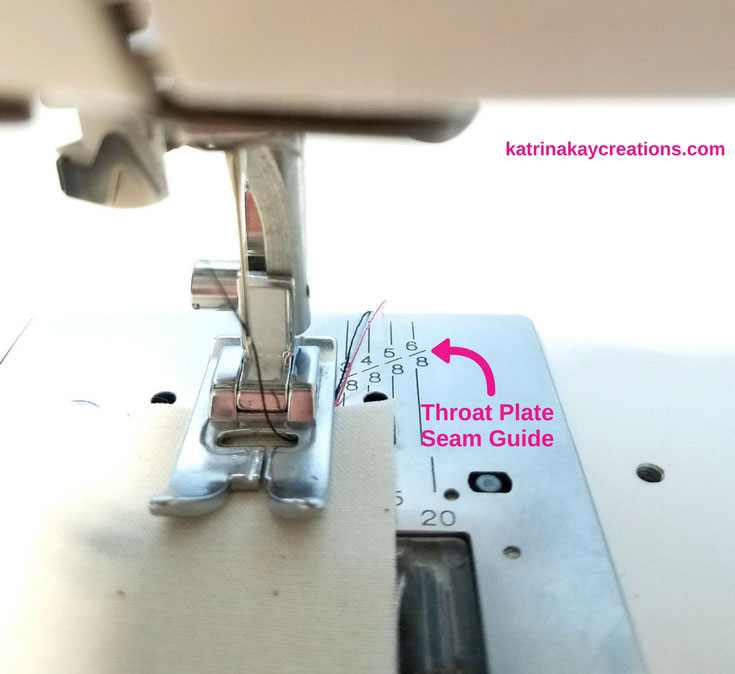
If you look at the throat plate of your sewing machine, you’ll notice guidelines. Each line is labeled with a measurement: 3/8”, 4/8” (or ½”), 5/8” (industry standard) and 6/8” (or ¾”). A ¼” seam is not labeled because it’s right in line with the edge of your throat plate, closest to the needle.
The guidelines and labels on your throat plate mark the distance from the needle to your desired seam allowance measurement. So if you want a 5/8” seam allowance, you have to line up your fabric edge with the line labeled 5/8”, and so on.
These guidelines are helpful, but can sometimes be hard to see. If they don’t work for you, there are other options that I discuss below.
2. Magnetic Seam Guide*
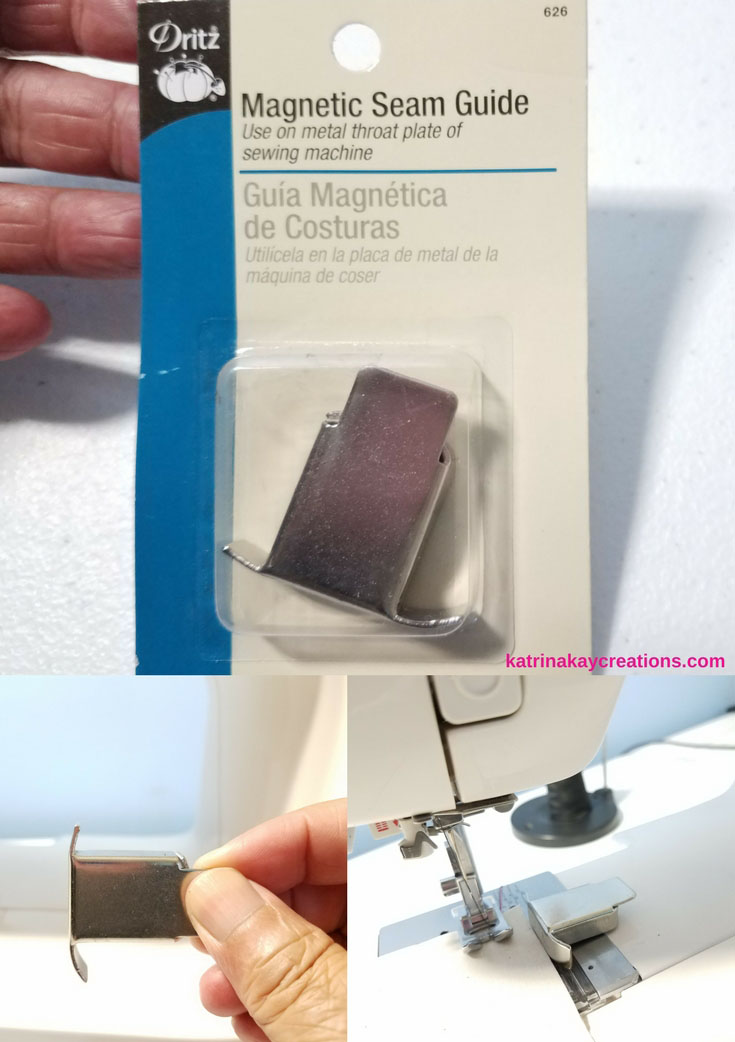
A magnetic seam guide is not only easy to see, it won’t budge when placed on the throat plate of your sewing machine. You can place it along any seam guideline on the throat plate and easily move or remove it if you need to.
I was told by a fabric store sales clerk that magnetic seams guides are not recommended for computerized sewing machines. But if you have a machine that isn’t computerized, this may help you keep your seams a uniform width.
The last time I was in my local fabric store I couldn’t find it, but you can buy a magnetic seam guide online at Amazon (They sell everything, don’t they?).
Lining your fabric edge against the magnetic seam guide as you sew will help you stitch a straight seam.
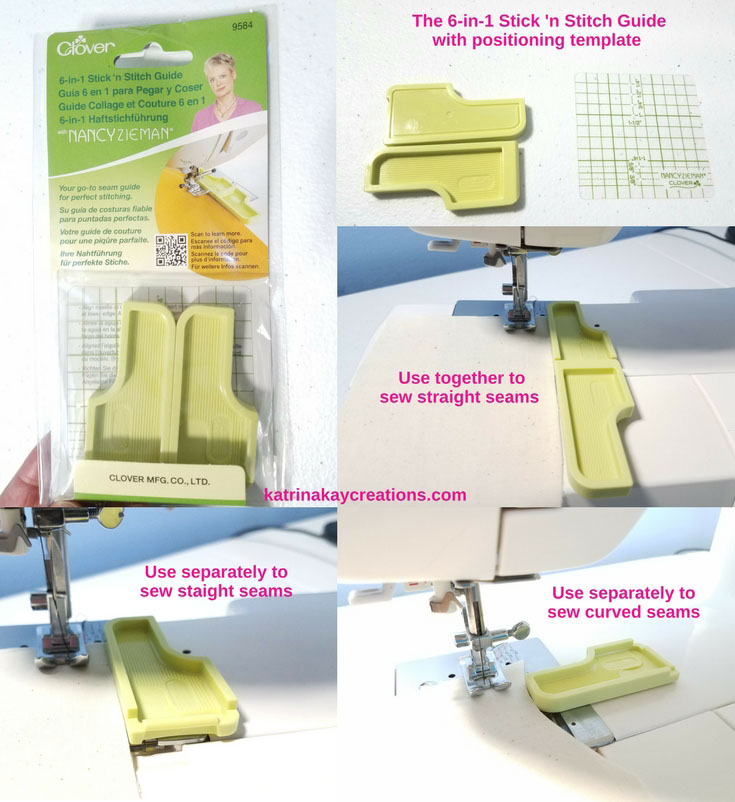
3. Nancy Notions’ 6 in 1 Stick ‘N Stitch Guide*
Nancy Notions’ 6 in 1 Stick ‘N Stitch Guide doesn’t just helps you sew straight seams straight and curved seams.
The 6 in 1 Stick ‘N Stitch Guide is a 2-piece guide that has a thin adhesive on the bottom. The thin adhesive allows you to stick it to your throat plate. The package gives you instructions for returning the seam guide to it’s stickyness when the adhesive gets weak.
You line your fabric up against it just as you would with the magnetic seam guide. Unlike the magnetic guide, this guide may move a little.
You can use the pieces together, for a longer guide, or separately (See photo below). They’re also easy to remove and reposition if you need to sew a seam allowance in a different width.
This seam guide also comes with a thin, plastic template with grid marks for commonly used seam allowances. The grid marks range from ¼” to 1-1/2” seam allowances.
Nancy Notions’ 6 in 1 Stick ‘N Stitch Guide costs more than the other seam guides I’ve mentioned in this post. There are definitely alternatives. This brings me to the last seam guide.
4. Painter’s Tape
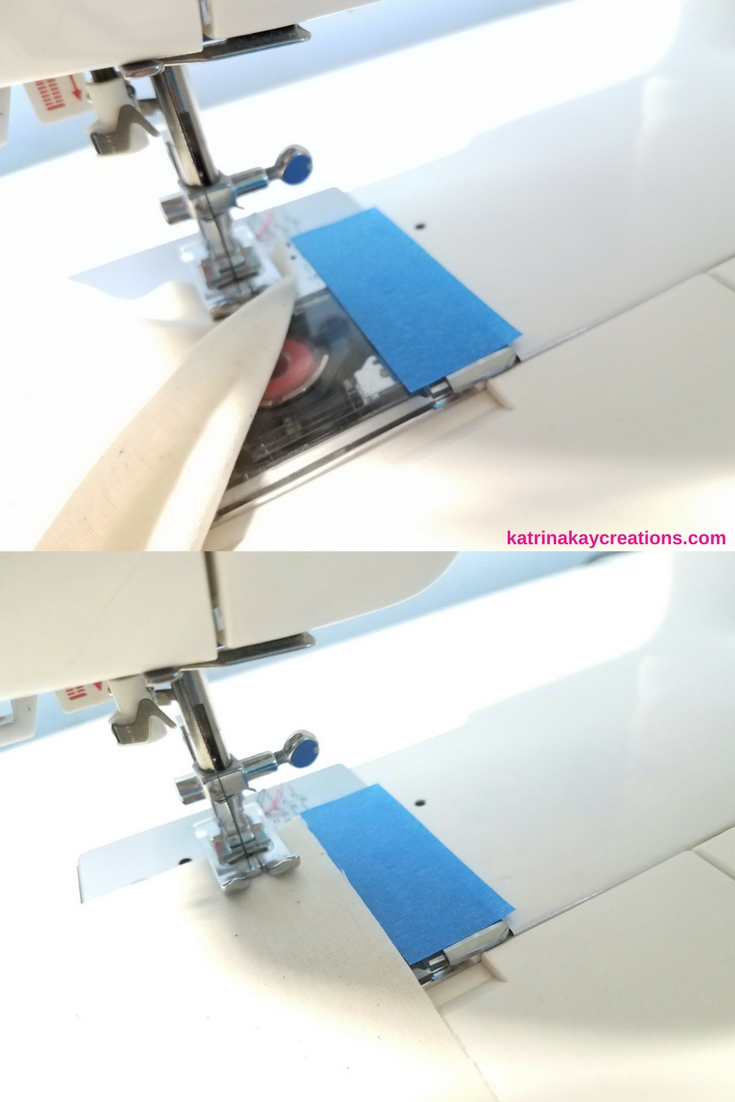
Painter’s tape makes for a bold colored seam guide. You may even have some already, like I do. It’s much easier to see than the guidelines on your throat plate. It also comes in different widths if you don’t want it as wide as the one I have pictured.
Washi tape will probably work, too. And it comes in all those prestty colors and designs.
You can also mark on the tape where you want to focus while sewing so you’re not looking at the machine needle.
I am not great at cutting my fabric completely neatly. I sometimes draw a Chalk line on the fabric to follow, if I really want to be sure!
(For sewing along)
That’s a good idea, Elly. Sometimes we have to do a little extra that helps us with our cutting and sewing.
I use blue painter tape. Easy to remove and adjust.
Yes it is, Susie. Thanks for commenting.
Read in 1 of my many magazines use the entire pad of sticky notes as a seam guide, not just one. This gives nice edge. My 70s Singer came w/great screw down changeable guide that works great. Alas, all my newer machines don’t have a screw hole. Thank you for review of Nancy Zs guide good to know it moves—I am very clumsy and seem to move the magnetic one often. The elastic or band I will give a try.
I can see the pad of sticky notes working very well. It would also be nice if all machines came with its own seam guide for beginners. Then just remove it when you no longer need it. Thanks for sharing, Jojo.
I don’t usually use a seam guide, I just seem to know where to place the fabric (many years of practice) however, that being said—-I had a HUGE problem reading the numbers on the machine needles. My Mom just gave me a stash she had and some of them aren’t labeled. I’ve even used a magnifying glass and there are 2 in particular that I can’t read so I’m tossing them. Any suggestions for this problem for the aging population???
I’ve had the same problem, Sandy. Those numbers are so small. I have to keep all the same sized machine needles together and label them. Empty jewelry boxes are good for this or those small ziplock bags. Just stick a piece of paper with the size in with the needles and put the bags in a box or tin container for safe keeping.
Empty medicine bottles are the best for storing needles, I’m on several, so I have a huge! assortment of empty bottles, I feel so guilty putting them in the landfills, I try to use them in any way possible.
That’s a great idea, Georgette. Thanks for sharing.
Using a colour code with different coloured nail varnish.
A color code is a great idea, Babs. Thank you for sharing.
Very annoying problem. I take a slightly enlarged, but crisp photo of the needle markings with my (always near) phone. Then I can quickly enlarge that on my phone and read the numbers more clearly. Delete the picture when done and no build up of extraneous photos on the phone. I hope that helps.
Thanks for the tips! I like the idea of painter’s tape since it doesn’t leave a residue. I use a wide rubber band or a piece of 1/4 inch elastic that has been sewn into a circle. They do move a bit sometimes, but they usually work pretty well.
Rubber bands and elastic are a great inexpensive solution. I never thought to use them.
I also love that painter’s tape doesn’t leave a residue and it peels right off if you need to remove it.
Thanks for sharing, Kara.
The Nancy Notion 6 in 1 is new to me. I like that it has a curved area for curved seams. A nice little ‘toy’ I would like to add to my collection of trinkets.
Yes, it is a nice little toy that actually works. Just make sure you keep the instructions because it tells you how to revive the adhesive if you need to.
I use a post it notepad. It is sticky and movable. Just run the edge of the seam along it. Linda
That’s good, Linda. I like that. It’s something most of us have plenty of and it gets the job done. Thanks for sharing.
I use a magnetic seam guide and it works well for me. I also use the edge of my presser foot as a guide and move my needle from the left position until I have the desired seam allowance I want to use.
Ah, yes, Karen. The presser foot is a great guide. It’s helped me sew straight many times.
I’m glad the magnetic seam guide works well for you. I love it because it doesn’t move while sewing.
Thanks for sharing.